Showing posts with label animal craft. Show all posts

Wednesday, May 3, 2017

ArtAchieve (Homeschool Review Crew)

ArtAchieve is a web-based curriculum that strives to help everyone believe they can draw. John Hofland, the program's creator, firmly believes drawing is a skill, not necessarily an innate talent - that anyone can hone and strengthen.  Celia has been working with Entire Level III package for this review - you may recall last summer that she completed the Level II program. (Make sure you read to the end to catch an update on those projects.) New lessons build on skills taught in prior lessons, with the goal being a student's project looks like what they intended. It's not about learning to copy the inspiration piece but learning to re-create it with individual flare.


Overall, ArtAchieve is a program is recommended for aspiring artists aged kindergarten (about age 5) to adult.  Because this is a skill-based program, if you're new to drawing, ArtAchieve recommends that you start at Level I, regardless of your age, so that you build a strong foundation for later levels.   ArtAchieve recommends the Level III program specifically for students age 9 and up because the program requires some motor and planning skills that younger students may not have the maturity for just yet.  (They offer a free sample lesson, The Czech Cat, for students to test skill level against. If you have an older/slightly experienced student, I recommend completing this project before choosing a level.)

Celia craves the arts like air: she plays two instruments, is the first chair violin in a local string orchestra, is both an actor and set builder in the school musical, and attends every after-school art club meeting she can.  When I add the fees for all of that up, my checkbook cries.  It's worth every penny, but that doesn't mean I don't cringe when I see a lot of pennies flying out every semester. One thing I love about ArtAchieve is that at only six dollars (plus materials) for an individual lesson, it's also an affordable lesson source.  However, if you purchase the entire level as a bundle, ArtAchieve will give you a 25% discount, effectively making each lesson only $4.50.  I can handle this with only a bare grimace.


However, don't let yourself be fooled by the price.  These aren't "cheap, don't expect much" lessons!  Each lesson includes about 70 minutes of drawing instruction time. We started with the first lesson, Hawaiian Frog.  Celia found that while the drawing lesson itself could be completed in an afternoon, the entire unit took closer to two weeks! ArtAchieve provides suggestions for cross-curricular content as well, making the lesson not just "draw a frog, and use color and line to make it artistic," but places the original piece in the context of its source, as well as providing additional ways to explore the topic.


Each lesson contains instructions in both video and PowerPoint formats.  Celia loves having both options.  She begins with the video, which explains not only the mechanics to draw/color her picture but also includes instruction on art theory.  For example, the Crane explores color, including the basics of complementary and analogous colors and using color in a painting.  Students are given the option to paint their pictures in colors that mimic nature or evoke emotion.  I like how ArtAchieve gives instruction in both and allows the student to personalize her work.  This is a crucial step in the development of an artist's personal style.  Realism in art is important -- the finely corded muscles of Michaelangelo's Creation in the Sistine Chapel help underscore the perfection of God's work, but there's certainly a place for the unique coloring of many of Picasso's works.


However, after watching the video (about 30 minutes), she will go back to use the PowerPoint instruction.  These provide step-by-step instruction without the frustration of trying to listen, draw/paint, and stop/start a video precisely. (She can also hit the arrow-over button with the back of a pencil or brush, limiting the potential for paint to get on the computer.  Definitely appreciated.)

If you're a full-time homeschooler that likes the Unit Study approach, you could probably do a lesson in about a week's time.   Since Celia is working on this "after homework and on weekends," it's taken her a few weeks for each lesson, especially since she wants to explore all of the "extras" in order to grow as an artist.  The lessons use different media - oil pastel, acrylic paint, watercolor, etc., and that has an effect on how long things take.  For example, her oil pastel frog itself took her about two hours, because she could go from area to area without waiting for anything to dry.  It also was small - drawn on letter-sized paper.


 However, her African Crane is currently on Day 11 since she began her line drawing exercises. She likes how the program doesn't say "OK, here's our canvas, let's go!" but instead breaks it down into smaller pieces that she can practice.


In addition, she's using an 11x16 canvas and acrylic paints for her finished piece.  She also did several test drawings on smaller paper,  working to scale parts up to a larger painting,  Now that she has begun,  the actual painting itself is taking several days. - choosing colors, layering paints, etc.
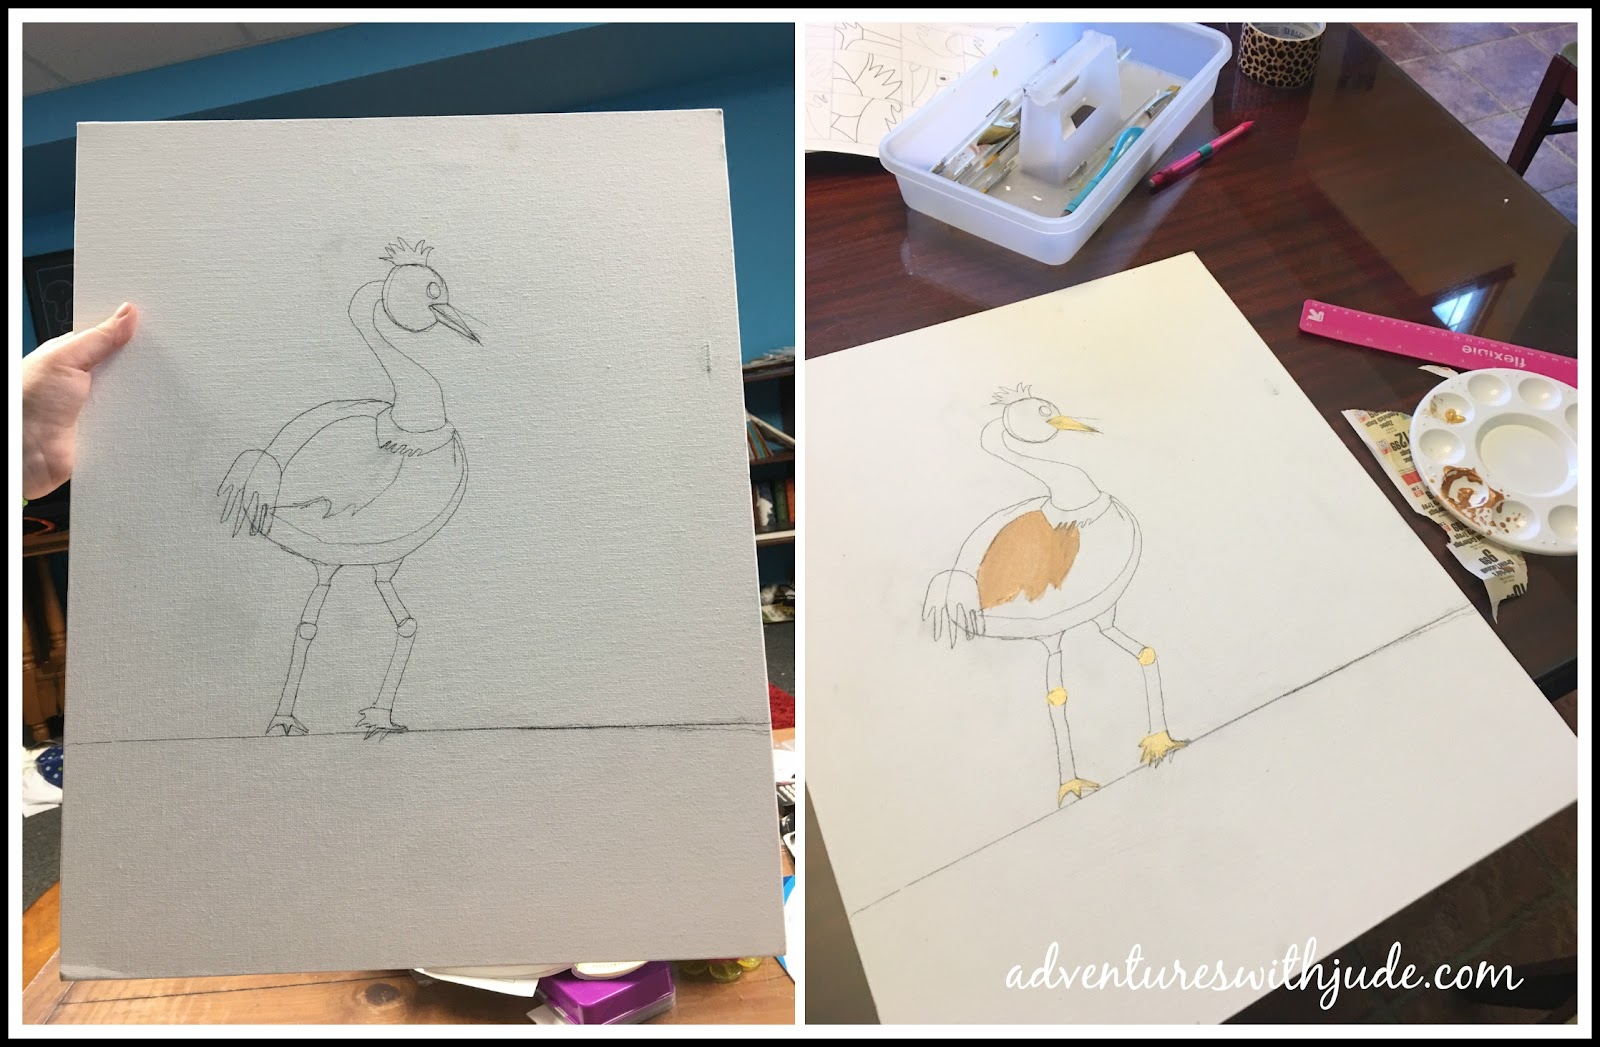

Finally, she's moving at a slow speed since her "studio" is also my dining room table.  She tends not to work on acrylics until she knows she has enough time to leave her paints out for several hours at a time, and the table has been in heavy use recently for non-painting endeavors.  However, both the program and the works being created are easy for her to stop and start working over several days' time without losing her place -- something that has frustrated her with other online art lessons.


If you're in a state that requires you to meet specific educational goals, you'll appreciate that the lessons are designed with National Coalition for Core Arts standards.   The lessons provide thorough instruction as both a fine arts course and in creating a well-rounded student.  These are the standards that the African Crowned Crane (III-lesson 2) meet:


If you have a student like Celia, looking for extra-curricular instruction, standards may not matter as much.  However, I like knowing that the program holds itself to these standards.  Whether she becomes a famous painter or just dabbles as a hobby, it's good to know that this program is laying a strong foundation.   I also like that it uses models from around the world to show that things like line, color, and indeed art, are universal.

Now, an update on Level II.  Celia worked on this last summer and took her portfolio to school last fall to show her art teacher.  She was impressed at the variety of subjects that Celia had worked with, including a Korean Wedding Duck and a Dala Horse.  (Celia has been updating her about the Level III subjects as well.)  This spring, Celia was invited to submit her Korean Wedding Duck to the school's art show, and it was chosen from show submissions to be part of a county-wide art tour.  Not bad for an "internet art program." 


She's looking forward to using Level III to broaden her portfolio for next year!

100 Crew members have been creating with ArtAchieve.  Click the banner below read their reviews.


Art Lessons Inspired From Around the World {ArtAchieve Reviews}


©2012- 2016 Adventures with Jude. All rights reserved. All text, photographs, artwork, and other content may not be reproduced or transmitted in any form without the written consent of the author. http://adventureswithjude.com

Wednesday, April 12, 2017

Banana Sharks

Rarely is there a day that passes that Damien doesn't either impress me or make me laugh.  One night, he managed to do both.

A few months ago, we signed up for a subscription with Kiwi Crates. The boys have really enjoyed the activities.  Damien was reading a booklet that came with a recent box and headed for the kitchen.  I'm never quite sure what to expect when I hear "Can somebody reach me a knife?" He had found a recipe that he could have with minimal adapting - Banana Sharks!

He needed a little help, but not much -- mostly just with trying to not cut the banana too much.  He did an awesome job assembling.


How to make your own Banana Shark:

1. Peel the banana and cut a slice from the bottom curve of the banana - you're just going to "level" it a little.

2. Slice a 1" slit in one end of the banana. Turn the piece you cut off sideways, and slip into the cut to make the tail fin.

3. Slice a 1/4" slit in the other end of the banana, and gently wiggle your knife to open the "mouth."  Add miniature chocolate chips to make the shark's eyes.  (Turn them upside down and stuff the pointy end in first - you don't need to push so hard to make them stick.)

4. Slice a strawberry into 1/4" slices.  These will be fins - use toothpicks to secure one slice to either side about 1/3 of the way back from the mouth end, and one on the top for the shark's dorsal fin.

Repeat to make one for your sister.


After I barely got past saying "Awww..." because he made one for Celia, I saw this plate.


Apparently, this shark liked Damien's bacon.  Sharks are carnivores, after all.


©2012- 2016 Adventures with Jude. All rights reserved. All text, photographs, artwork, and other content may not be reproduced or transmitted in any form without the written consent of the author. http://adventureswithjude.com

Monday, March 3, 2014

Behold the Lamb of God: A Lenten Daily Project


Behold the Lamb of God - A Lenten Daily Project


Each since Jude started homeschooling, we have done a "long" project for Lent.  Each day, we have done a short activity, but with the idea of seeing Lent as a season.  This year, the plan is to fill in the body of a sheep, to represent Jesus is the Lamb of God.  We've made our sheep already, so that we are ready for Ash Wednesday.


Lamb of God craft


To make your own sheep, you will need:

posterboard
markers and crayons
construction paper
etc.


For the daily activity, you will need:
cotton balls
glue

Create your sheep on the poster board, using whatever craft supplies you like.  We used construction paper and colored pencils.  (When Jude and I made the body, I gave him four points to pass through to make his oval.  He turned it into a dot-to-dot, hence the numbers around the body. They're optional.) Leave the body empty.

On the poster, we wrote the Gospel verse:

 “Behold, the Lamb of God, who takes away the sin of the world. "
 John 1:29

Each day, we will add one cotton ball to the sheep. You can either leave the body empty and simply glue one in each day, or use a coin to trace 40 circles on the body, and number them.  (I recommend numbering them for younger children, so that they can see Lent is a finite time and are not overwhelmed by all of the empty space.)  

Again, we will be incorporating copy work into our lessons.   Using the readings from Daily Mass, we will read the reading aloud and then copy one or two verses of that reading.  The passages listed are only one or two verses long, so they are not overwhelming for Jude to copy.  If your child is older and can copy longer passages, you can find each day's source reading via the Daily Readings calendar here.  I've also included a passage that we will copy on Easter morning, proclaiming Lent has ended because Jesus is Risen.

Note: In the Roman Catholic rite, Solemnities are celebrations of holy persons and days that have a direct effect on the life of Jesus and the Church.  Although March 19 (The Solemnity of St. Joseph) and March 25 (The Solemnity of the Annunciation) fall this during the liturgical season of Lent, because of the stature of these two days -- celebrating the two people who said "Yes!" to God's call to parent the Child Jesus -- they are not considered days of Lent.   Because they fall on weekdays, we will read from those days' readings to keep our reading and copy work momentum going, but just will not add to the sheep.  (You can read about why these Solemnities supercede Lent's austerity here.)  

If you prefer a printable copy of the listing, click the lamb below.

Bible Verse Copywork for Lent downloadable printable


Ash Wednesday Joel 2:12-13
Thursday Luke 9:23
Friday Psalm 51 18-19
Saturday Luke 5:27-28

First Week of Lent
Monday Mt 25:34, 40
Tuesday Mt 6: 14-15
Wednesday Psalm 51:12
Thursday Esther C:40
Friday Ezekiel 18:21
Saturday Mt 5:44

Second Week of Lent
Monday PS 79:9
Tuesday Mt 23:1-12
Wednesday (Solemnity of St. Joseph, Spouse of the Blessed Virgin Mary) Ps 89:4-5
Thursday Jeremiah 17: 5, 7
Friday Mt 21:42
Saturday Micah 7:18

Third Week of Lent
Monday 2 Kings 5:13
Tuesday (Solemnity of the Annunciation of the Lord) Ps. 40:8-9
Wednesday Dt 4:9
Thursday Psalm 95:6-7
Friday Hosea 14: 2-3
Saturday Luke 18:14

Fourth Week of Lent
Monday Isaiah 65:17-18
Tuesday Psalm 46: 2, 8
Wednesday Isaiah 49:8
Thursday Psalm 106:20, 23
Friday John 7:28-30
Saturday Psalm 7:9

Fifth Week of Lent
Monday John 8:7
Tuesday Psalm 102:2-3
Wednesday Daniel 3:52
Thursday John 8:54
Friday Jeremiah 20:11
Saturday Ezekiel 37:26-27


Holy Week
Monday Psalm 27:1
Tuesday John 13: 37-38
Wednesday Isaiah 50:7
Holy Thursday John 13:13-15
Good Friday John 19:30
Holy Saturday Psalm 33:12-13

Easter Sunday (from Victimae Paschali Laudes, proclaimed on Easter Morning)

Christ indeed from death is risen, our new life obtaining.
Have mercy, victor King, ever reigning!
Amen. Alleluia.


©2012- 2014 Adventures with Jude. All rights reserved. All text, photographs, artwork, and other content may not be reproduced or transmitted in any form without the written consent of the author. http://adventureswithjude.com

Thursday, August 8, 2013

Upcycled Crafts


While I keep a general stash of craft supplies on hand, some of the best supplies are (almost) free.  Packing boxes, paper towel/toilet tissue rolls, and formula cans get hoarded as well for projects.

Last winter, we used a box and cardboard rolls to make a Nativity Set, complete with Magi.

nativity set from recycled boxes and cardboard tubes


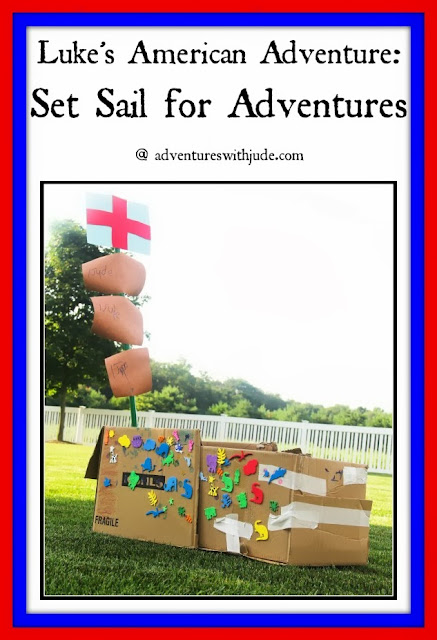
And here's a couple of Amazon boxes, along with some duct tape and the kitchen broom, transmogrified into a caravel:

upcycling boxes into an explorer's caravel


We even made some some octopuses that went visiting over at The Usual Mayhem!

toilet roll octopuses

Here are two new crafts.  I know I have a lot of tubey friends, and we are always looking for something to do with empty formula cans.   We covered cans with some pretty fabric, ribbon, and glitter paint, and they are now containers for Celia's hair clips.

cover a can with pretty fabric to make a barrette bin


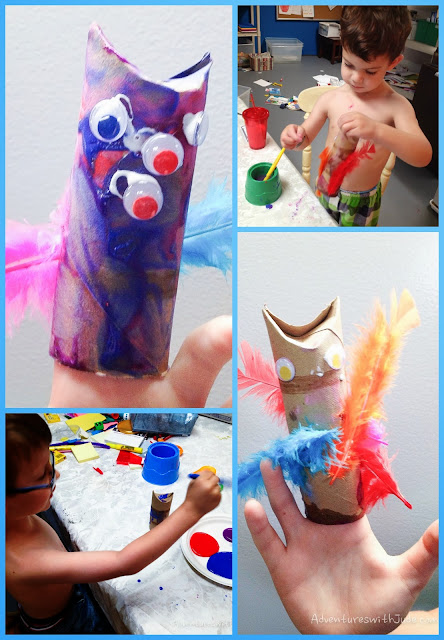
Finally,  silly birds made from a paper towel roll.  You can use as toilet tissue roll, but then you need one per person. I like paper towel rolls because I can cut them in half and give each little boy a piece when we use them.  Originally, they were intended to be owls - like these cuties.

Photo and craft idea: Natural Kids/naturalkidsteam.com

But then the boys decided to make them "Alien Owls" with crazy feathers and extra eyes.


alien owls

To make these:

Cut a paper towel roll in half, or use a toilet paper roll.


Bend the top edges together, overlapping slightly, to make the pointed ears.


Paint.


 Add google eyes and feathers.


I hope I've convinced you to have three waste bins - one for trash, one for recycling, and one for "craft supplies."


Click on the button below to read what my fellow Crew members are blogging about. With topics ranging from Reading to Road Trips and Curriculum inbetween, there's something for everyone!

Summer Blog Hop


©2012- 2013 Adventures with Jude. All rights reserved. All text, photographs, artwork, and other content may not be reproduced or transmitted in any form without the written consent of the author. http://adventureswithjude.com

Wednesday, February 27, 2013

Our octopuses went visiting...

Last week, we learned about octopuses.  Yes, that's really the "official" plural, not octopi.  We learned that they have eight arms to help them find their food, and the move about by jet propulsion -- they take in water and then squirt it out so quickly that it moves them where they want to go. 

We also made adorable little octopuses.  Today, we are guests of The Usual Mayhem, and you can see there how we made them.  Our thanks to Erin for hosting us, and her patience when our little octopuses got lost without a map. 


I'll leave you with a little poem that we learned as well --

cardboard towel roll and felt octopus 

The Octopus

Tell me, O Octopus, I begs
Is those things arms, or is they legs?
I marvel at thee, Octopus;
If I were thou, I'd call me Us.

Ogden Nash

Wednesday, February 13, 2013

You're a Catch, Valentine!

The task: an arts-and-crafts project that went with the fish we were reading about.  Pinterest wasn't helping me -- we already had done three others, and the rest that I could find are really all variants on it, or coloring pages.

What I did have were some Valentine's pins, and I melded them into this project.  One was the phrase - that was attached to a bag of cheese flavored fish crackers.  The fish themselves were part of a mix of animal bodies that could be fashioned out of hearts.  We had some craft foam shapes from another project, so I pulled them out for today.  (Mostly I'm impressed I found them in the second place I looked for them!)  While Jude worked on his math, I sorted out some of the hearts.
We glued the hearts edge to edge to make fish.  Jude preferred blue paper (his favorite color AND the color of the ocean), while Damien opted for the pink sheet that was at the top of the pile.

Just a dot, not a lot!

Little hands working


 I wrote the phrase, "You're a great catch!" on Damien's paper.  Jude used Damien's as the master to copy onto his paper. 

copy neatly


 I had to include this one.  
Matthew was taking pictures for me, 
and Damien looked up when he saw the flash fire.  
Don't you just want to eat him up like a box of Valentine chocolates?


Valentine's Day - You're a a Great Catch
 Happy Valentine's Day!


We love our friends!!

Virtual Refridgerator


Tuesday, February 5, 2013

Lucky Goldfish! He's Celebrating Chinese New Year!

Jude decided he wanted to study fish for our next science chapter.  Coincidentally, next week is Chinese New Year, so we combined that into our unit study with several books about it, and both tied into our goldfish craft.

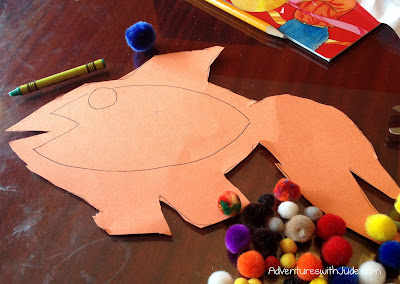
Our model was the Good-Luck Goldfish craft featured at Spoonful.com.  I printed out their template and cut it out for Jude to trace.  (I opted to cut it myself because it needed a little "fill in the blank" edging in some spots -- the template went outside my printer's margins.) Then we traced it onto orange paper.  Jude was able to cut it out with a little help in some of the tight areas.


Once it was cut out, I drew the inside lines onto our goldfish.  I just eyeballed at the margins.  Since we were going to add pompoms to make the scales (rather than cutting it out and adding scalloped tissue paper like the original), the edges did not need to be exact.  It just became a guide line for putting our "scales" on, so they stayed on the body and did not extend out onto the fins.

Chinese New Year fish craft


Gluing on puffy pom poms.  Dot, puffy.  Dot, puffy.  Dot, puffy!  Dot, puffy!
"Mommy, it's a pattern!!"  
(Ooh. Math practice, too.  Sneaky Mommy.)


Our colorful fish.  Glub!
Chinese New Year fish craft


Swim on over and see what's happening at:

Virtual Refrigerator Teach Beside Me
Related Posts Plugin for WordPress, Blogger...
Pin It button on image hover