Showing posts with label vegan. Show all posts

Wednesday, February 8, 2017

If you give a kid a math problem...

Food allergies take over your life. We're currently working on a new review -- a unit on Money from Math Mammoth.  As we started, I felt Damien was far enough in his usual curriculum (Math U See Beta) to tackle it, but today I discovered he was a little short on subtraction skills when he realized he couldn't subtract five from one, but knew that 55 was less than 71.  Today's crash course: borrowing.


This problem needed only "single" borrowing.  When Jude was learning to borrow, I tried to explain it sixteen ways to Sunday until I finally hit on something concrete that was important to him -- food.  I went with that example first this time and explained borrowing by saying "I asked you to give me five cookies, but you only have one.  You need to borrow some from somebody else so you can give me five.  You can go to Jude and say, 'Hey, do you have any extra cookies I can borrow?'  Here, the five borrows from the seven..."  Damien got it right away.

A page later, he was trying to subtract 78 cents from a dollar - or 100 cents.  He couldn't borrow from the tens place, because that had a zero.  Back to the cookie analogy: Damien needed to give me cookies, but had none. He tries to borrow from Jude, but HE has none. Jude has to borrow from Matthew, then give Damien some of what was borrowed.  I could only laugh at Damien's response: "I kinda get it, but you can't eat his kind, you're allergic. Shouldn't Jude to borrow from Dad since you have the same allergies? "

Point, Damien.

He then pointed out he didn't have any cookies to lend me to start with -- could we make his kind of cookies?  Well played, kid.   We searched and found a recipe from Blissful Basil that looked re-workable.  The lesson of the day?  If you give a kid a math problem, he's probably going to want a cookie to go with it.


Oatmeal Sunbutter Cookies


1 cup Sunbutter (sunflower seed butter)
1 cup brown sugar
2 tsp. vanilla extract*
1 cup oat flour**
1 tsp baking soda
1/8 tsp salt
1/4 cup coconut milk + 1 tsp vinegar or lemon juice***

Ingredient notes:

*Since vanilla extract isn't on our safe list, we used 2 tsp. of 896 Aged Gold Rum.  It's aged in oak barrels, so it gives it a vanilla undertone, extracts alcohol-soluble flavors, and adds moisture.

**If you don't have oat flour in your pantry, pulse 1 cup quick-cook oats in a blender or food processor until flour-y.

***Either option tastes fine, but do not omit unless you are planning to eat them all immediately.  The dough needs to be slightly acidic so that the sunflower seed butter doesn't react with any unused backing soda, or else the cookies may turn green if kept overnight.  They're perfectly safe to eat, but it can be a little disconcerting.

Directions:

Preheat oven to 350*F.

Cream together the sunflower seed butter and brown sugar until light and fluffy - about 3-4 minutes with a stand or hand mixer.

Add in vanilla extract and stir to combine.

In a separate bowl, whisk together the oat flour, baking soda, and salt.

Slowly add the flour mixture to the sugar mix. Mix on low until combined, then add milk.  Continue mixing until the liquid has been absorbed.


Portion dough onto cookie sheets in about 1 tablespoon drops.  (We used a small (#40) ice cream disher.) If you use a spoon, roll the dough into balls.


Slightly flatten the tops with a fork, if desired, to get the traditional "criss-cross" pattern like on a peanut butter cookie.


Bake for 8-10 minutes, or until edges are slightly browned.


Somebody wanted to make sure none of the cookies got "borrowed" before he had a chance to eat them.

Cool on cookie sheet for 5-10 minutes so the structure can set.  (If you move them too quickly, they will fall apart.) Transfer to a cooling rack until completely cool.


Store lightly covered (if you have any that aren't eaten!).


©2012- 2016 Adventures with Jude. All rights reserved. All text, photographs, artwork, and other content may not be reproduced or transmitted in any form without the written consent of the author. http://adventureswithjude.com

Saturday, October 29, 2016

Banana Oatmeal Pancakes for Celia

Vegan, Gluten Free, Dairy Free

What a week! I don't usually post new recipes on Saturdays, but I'm putting this one up today at Celia's request.

On Thursday, I made pancakes for the big boys, and Damien looked at me with eyes that were straight out of Oliver Twist: "Can you make some for poor, pathetic me?"  He had never eaten pancakes before - he never had enough foods to make one that would stay together.  I've been trying to study more about cooking chemistry so I can re-create what everyone else is having even when I'm hamstrung by having only three or four ingredients.  It seemed like a good day for an experiment.


I went with the overall ratio of equal parts flour and acidulated liquid, with one egg and one teaspoon leavening per part.  My "shop the pantry list" was oat flour, coconut milk, and a banana to replace the egg.  (I was glad to have a chance to try out the new package of pre-ground oat flour; usually, I grind it myself from rolled oats.)  Leavening was actually the easy part -- baking soda is considered a non-food (since salt is a mineral, not an actual food), and I have both coconut and wine vinegars (the latter from their kids' recent grape trial).  That left me with a recipe of:

1 cup oat flour
1 Tbsp coconut vinegar + evaporated coconut milk to make 1 c.
1 mashed banana
1 tsp baking soda

This made about 8 decent sized pancakes (bigger than silver dollars, but not quite diner-plate size).   Damien ate some, and Celia ate the leftovers when she came home from school.


By Friday,  we had two bananas that needed to be eaten "yesterday," so  I tried a double batch.  I decided I preferred to add a little extra milk (maybe a tablespoon or so) to thin down that much oatmeal to a pourable consistency, but they were still viable with the base 2 cups of coconut milk.  Awesome!

Then, on Friday night, my mom fell. I spent the night with her and my dad in the ER,  getting x-rays and ultimately a splint-cast and sling for a broken shoulder and elbow.  The docs finished and finally discharged her around 5:30 in the morning. (Next time she wants to party all night, I'm going to suggest a nightclub where at least there's decent music!)  I came home and crashed.  Thankfully, the kids let me sleep a few hours, but Celia decided she was going to make breakfast for everyone -- bacon and pancakes.

She did an excellent job following the directions on the back of the gluten-free Bisquick box (even adding chocolate chips to the ones she brought up to me when she woke me up), and then decided to make a batch of oatmeal pancakes for Damien and herself.  She thought, "I don't know the recipe, but I'll just check Mom's blog.  She always puts the new recipes there."  Poor kid -- I hadn't gotten that far this week, so instead of pancakes, she and Damien got plain old oatmeal! Last night, as I got dressed to run to my parents', my very experienced ER-tripper gathered a bag of granola bars, a bottle of water, and a battery phone charger (WITH spare cord!) and shoved them at me as I bolted out the door.  I told her I'd post the recipe right away as a thank you for her quick thinking. Now she can make herself pancakes any time she wants -- but hopefully, it won't be because Mom's been at the hospital all night!


Banana Oatmeal Pancakes

Makes about 8 pancakes

1 banana
1 cup oat flour
1 tsp baking soda
1 Tbsp coconut vinegar + evaporated coconut milk to make 1 c.
canola oil (for pan)

Preheat griddle or skillet. Mash the banana until smooth.

In a separate (larger) bowl, combine oat flour and baking soda.

Add banana and milk, and whisk to combine.


Pour about 1 tbsp of canola oil onto hot pan.  Using a folded paper towel, carefully wipe the oil across the surface to grease the pan.

Drop batter onto pan in scant 1/2-cupfuls.  Cook for 3-4 minutes,  flip, and cook 2-3 minutes more.


Serve with syrup of choice (we like Lyle's golden syrup, either plain or with a bit of cocoa powder mixed in), or just gobble down plain.


©2012- 2016 Adventures with Jude. All rights reserved. All text, photographs, artwork, and other content may not be reproduced or transmitted in any form without the written consent of the author. http://adventureswithjude.com

Monday, September 19, 2016

Bake Sale Worthy Chocolate Chip Oatmeal Bites


Don't you just love when your child says, "It's ok, you can do whatever's easiest!" when they really mean "I know it's a zillion steps, but do you think maybe you could pull off your latest kitchen wizardry, but in a bakery sized batch?"  Celia's class is sponsoring a bake sale, and in the past I've stuck a ten dollar bill in an envelope and called it good.  I figured there was no point to making treats she couldn't eat, and the class actually made out better.  This year, she wasn't going for it, and asked if I could make cookies -- enough for two dozen helpings to sell.  I told her I would if she helped make them, but in exchange she had to convince Neal to go get more bananas (since Damien at the last one this morning before I could rescue it). Fair trade, right?  Since she got Daddy to take her to the produce market,  I got to grind oats into flour, and we baked after dinner.

My original plan was to make oatmeal Marranitos, because they were a fairly easy cookie with minimal ingredients but a nice "wow" factor for a bake sale.  Ultimately, we didn't make them because the dough wasn't stiff enough to roll out.  I grabbed a bag of chocolate chunks from the cabinet, and boom! Oatmeal chocolate chip cookes.


Go ahead, applaud my genius.  Hey, with an almost-teen girl, anything chocolate makes me the hero!

My next big purchase is going to be something that is more efficient for grinding oatmeal into flour.  I've been using my blender, and it works, but it takes a lot of small batches.  For the moment, I'll have to be content with my measuring cups that have not just the standard cups but also a bonus 3/4 cup scoop.  It made measuring out the brown sugar easy -- only two scoops to pack instead of three or four.  If you're in the market for new measuring cups, I highly recommend these.


Back to the cookies -- these really impressed me.  They came out with a soft, pillowy texture - more like a cereal bar than a chocolate chip cookie - and held together well.  For all the sugar, they're not overly sweet -- one recipe makes 5 dozen two-bite cookies, so it's not much sugar per cookie, but the ratio of brown sugar and baking soda work together nicely for creating a cake-like cookie.  I've also recently discovered barrel-aged rum makes a really nice replacement for vanilla extract.  The aging gives it some bright toffee and vanilla flavors without adding extra ingredients to the extract (vanilla isn't something we've gotten the green light to trial with her yet, and it's not something I'm pushing because it would be a really hard trial to get sufficient volume into her.)   You can substitute vanilla if you prefer, but it did at a little bit of caramel undertone that was unexpected but added interest.  I have a feeling these aren't going to be bake-sale-day only cookies!


Baked Oatmeal Bites

Makes approximately 5 dozen cookies

1 3/4 cups dark brown sugar
1/4 cup coconut oil (solid)
1 banana (mashed)
1 can (12.2 oz) evaporated coconut milk (unsweetened)
1 1/2 tsp aged rum (or vanilla extract)
24 oz gluten-free rolled oats ground into oat flour (approx 7 1/2 cups flour)
1 1/2 tsp baking powder
1 tsp xanthan gum
1 10-oz bag chocolate chunks

Preheat oven to 350°F.  Line a baking sheet (or two) with parchment paper or no-stick aluminum foil.

Cream together the sugar and coconut oil.  Add the banana, milk, and coconut oil and stir to combine.


In a separate bowl, whisk together the oat flour, baking soda, and xanthan gum.  With the mixer TURNED OFF, add them to the work bowl.  SLOWLY turn on the mixer and stir on low until thoroughly combined.   Remove beaters.

Add chocolate chips to the bowl, and stir to distribute them.

Drop by rounded tablespoons onto the cookie sheets.


Bake for 10 to 12 minutes, or until puffy and set with golden edges.


Store them in an air-tight container.

©2012- 2016 Adventures with Jude. All rights reserved. All text, photographs, artwork, and other content may not be reproduced or transmitted in any form without the written consent of the author. http://adventureswithjude.com

Monday, April 11, 2016

Kirsch & Cherries Sorbet for Grownups (W is for Water of Life)


The term aqua vitae, or "water of life," stems from the days of Roman Empire. If a soldier was in pain, a healthy dose left him feeling quite fine.  Poured onto wounds, it literally saved lives as it kept infection away.   It was around the Middle Ages, the term became synonymous with distilled spirits, such as brandy.  Every country and language has it's own native spirit: the grain-based Gaelic uisce beatha that we call "whiskey",  French eau de vies made from fruits and nuts, especially the popular apple-flavored Calvados brandy, traditional Russian vodka made from potatoes, and the German kirschwasser, or "cherry water." 

When Luke was taking his cooking classes, one of the sections specifically discussed  "desserts for grownups."  One of the recipes was for "Bachelor's Jam" - a concoction of summer fruits that are layered with brandy and left to ferment through the fall, then served with light cake.  Since it's currently spring (or so says the calendar -- the weather hasn't quite gotten with the program), there aren't any overripe fruits to ferment with brandy yet. We opted to turn some frozen cherries into sorbet.  It's an equally simple dessert - only five ingredients - but one that will impress guests.

Kirschwassser is a German distilled brandy made from fermented cherries -- think cherry wine that has been further refined.  This clear spirit has more of a cherry "aroma" than flavor.   Kirsch is very popular as an ingredient in fondues, black forest cake, and cherries jubilee, as well as both an aperitif (before-dinner drink) and digestif (served after dinner). It's very strong - usually 90 proof, or about 45% alcohol) and not sweet at all.  When I first tasted it, I was expecting something closer to amaretto than moonshine!

Perhaps kirschwasser served neat is a bit of an acquired taste, and I just have yet to acquire it!  However, as an ingredient, it is much softer.  The spirit bring out the alcohol-soluble flavors in the cherries, and boost their sweetness without making it cloying.  Lemon juice provides acidity and brightness. We froze ours in an ice cream machine and then let it set in the freezer to make a sorbet, but even just churned from the machine makes a darn good adult cherry slushy.  

Gaudete omnes! Cheers!

Kirsch Sorbet


3/4 cup sugar
1/2 cup water
10 oz cherries (we used frozen; if you used fresh ones, pit them first!)
1 cup Kirschwasser
juice of 1 lemon (about 1/4 cup)

In a smalls saucepan, heat sugar and water until sugar is dissolved.

NOTE: If you are using a machine like ours that has a built-in freezing compressor, you can continue immediately.  If you are using one  that has a put-in-the-freezer-first bowl/core, refrigerate the syrup until cold.

Place cherries, Kirsch, and lemon juice into a blender.  Add the (cooled) sugar syrup, and puree until smooth.


 Luke says, "NOTE TO SELF.  Blenders work better when they're plugged in!" 

 If you're using frozen cherries, you can probably go directly to the machine, but if you're using fresh ones, chill everything down about 3 hours.

Pour into your ice cream machine and follow the manufacturer's instructions for freezing .  Ours took about 40 minutes to churn.


After it's frozen, either serve immediately (it will be very soft) or put in a covered bowl and freeze until firm.

If you don't have an ice cream machine, you can make a granita-like desert. Place the puree into a 9x13 glass dish and cover with plastic wrap.  Freeze for about an hour, or until the edges are firm.  Stir, and return to the freezer for about 2-3 hours, stirring every half hour or so.  If you want an icy dessert, serve directly from the dish; if you'd like yours smoother, put it back in the blender and puree for a minute or two.

Serve this as an intermezzo, dessert, or digestif.  Kirsch is so potent that it is only served in 1-2 ounce pours, so with a whole cup in this recipe, you don't want to dole out large bowls!  It might seem a little stingy to serve tiny demitasse-sized cups or glasses, but believe me -- much more and your guests may be wobbling from the table!


©2012- 2016 Adventures with Jude. All rights reserved. All text, photographs, artwork, and other content may not be reproduced or transmitted in any form without the written consent of the author. http://adventureswithjude.com

Monday, March 21, 2016

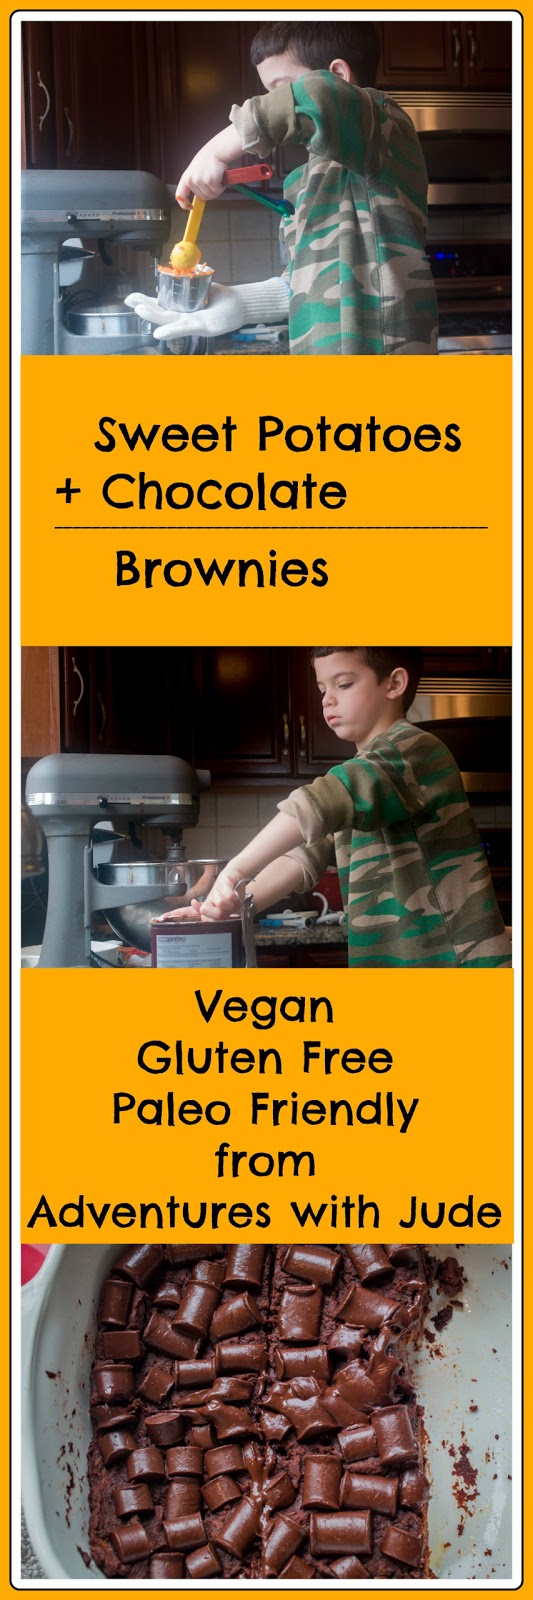
Sweet Potato Brownies (U is for Unconventional)


In 10 years as an allergy family, we've made some pretty strange substitutions.  We've subbed gluten-free for wheat flour, applesauce for eggs, coconut milk products for dairy. However, this time, we went pretty far out on a limb to make these brownies.

Now that it looks like both Celia and Jude are tolerating sweet potatoes, the hunt is on to find things to do with them.  Thankfully, sweet potatoes are popular for Paleo diets, so that means there's plenty of inspiration out there on Google and Pinterest.  I found this brownie recipe  from A Big Man's World and it had promise.  It still needed a few tweaks to work for us, but it was a start.   It's certainly unconventional - no butter, no milk, no flour, no eggs, but it's still delicious and fudgey.

Damien loves to help in the kitchen, and usually plays sous chef to one of the older kids. Since he was the only kid home at the time, he got called up to the major leagues! I think his first "head chef" dish was a success!

Sweet Potato Brownies

gluten free - vegan - paleo friendly
makes 6-9 brownies

1 Tbsp coconut oil
1 cup mashed sweet potato (about 2 small potatoes)
1/2 cup coconut manna (coconut butter)
2 Tbsp coconut nectar (or maple syrup)
1/4 cup cocoa powder
1/4 cup chocolate chips + about 1/4 cup for on top (optional)


1. Grease a small pan (we used a 1 quart Corningware dish - about 7" square) with the coconut oil.  Preheat the oven to 350°F.


2. You'll need to acquire 1 cup of mashed sweet potato.  We microwaved two small potatoes and peeled the skin off, since we didn't have any already in the refrigerator.  Place it into a mixer bowl.


3. Add the coconut manna and nectar.


4.  Mix on medium speed until smooth.


5.  Add cocoa powder and mix on low speed (so you don't wear it!) until combined.  You might need to stop and scrape the bowl down.


6.  Add the first 1/4 cup of chocolate chips. Stir to combine.


7.  Turn the batter out into the pan and smooth the top.


8. Optional: Sprinkle the top with the second round of chocolate chips.  Or, if you're five years old or a chocolate fan, painstakingly cover the entire top of the brownies with chocolate.


9.  Place in preheated oven and bake 20-25 minutes, or until a tester comes out with only a few crumbs.  You can lick the beaters, too.


10.  Slice and enjoy.  Ideally, share.


©2012- 2016 Adventures with Jude. All rights reserved. All text, photographs, artwork, and other content may not be reproduced or transmitted in any form without the written consent of the author. http://adventureswithjude.com

Monday, March 14, 2016

Topped with a Cherry (T is for Two Ways)

Topped with a Cherry (T is for Two Ways)

The original theme for this week's post was going to be "T is for Topping".  Luke and I made cherry topping to go on chocolate waffles, making them into "Black Forest Waffles."

Black forest waffles

And when I said to him, "Can you please write up the recipe, and I'll write the rest of the post?" he emailed me a copy of his half of the post.

I was confused, so I read it a couple more times.  And then I said, "Luke?  I'm not sure where this recipe is from, because it's NOT what we made."  His response was, "Oh.  Well, I'm hungry anyway, so want me to just make this, too?"

Why not?

So now you get the benefit of cherry topping, made two ways.  The first uses frozen cherries, the second one calls for dried fruit.  Either one is good on pancakes, waffles, or french toast...or just atop some ice cream.

Black Forest Waffles 


Chocolate Waffles

Ok, I cheated.  They were made from a box of cake batter.  King Arthur Gluten Free, to be exact. Make according to the box directions, and bake in a waffle iron instead of an oven.

Chocolate cake waffles


Ice Cream

Vanilla ice cream from the grocery store for the dairy-eaters here.  The non-dairy kiddos had homemade coconut ice cream.

Cherry Topping

 2 - 12 oz bags of cherries
1 c. powdered sugar
1 Tbsp vanilla
1 Tbsp cinnamon

Directions:

Take both bags of cherries out of the freezer.

Put  one bag of frozen cherries in a pot.  Top with the powdered sugar, and stir to coat the fruit.  (This helps the starch in the sugar disperse into the liquid to help thicken it.)


Bring the mixture to a rolling boil, and and the vanilla and cinnamon.

Continue to boil until the syrup reaches the soft-ball candy stage (235°).  (Let the 2nd bag sit out to defrost while the first cooks.)

Add the second bag, and cook until the cherries are warmed through.  (The uncooked cherries add acidity to brighten the flavor, thin the syrup a bit as they defrost,  and larger pieces of cherry to contrast with the first bag that is cooked down and thicken the sauce.)


Spoon over waffles and ice cream.  Refrigerate any leftovers to serve with more ice cream, waffles, yogurt, etc.


Cherry sauce


Cherry Fudge Sauce


This sauce will be thin when it's first ready, but will thicken as it cools.  It becomes very fudge-like when it's cold.  I keep the leftover in a Mason jar in the fridge, so I can run it under hot water to return to a pourable consistency.

½ cup dried cherries
8 tablespoons Earth Balance Margarine
½ cup Enjoy Life mini chips
½ cup So Delicious coconut milk beverage
1 ½ cups powdered sugar
1 ½ tsp vanilla

Directions:

Place the cherries in a small bowl. Cover with hot tap water, and microwave on high for approximately 30 seconds. Let them stand in the microwave while you prepare the sauce.


In a large saucepan, melt butter and chocolate pieces over medium-low heat, stirring constantly.


Whisk in the powdered sugar.  The mixture will get very thick - almost gloppy.


Add milk and vanilla, and whisk until smooth.


Once the chocolate is smooth, remove cherries from the microwave. Pour off the soaking liquid from the bowl, and gently press the cherries to remove any excess liquid (use the back of a spoon or your hands). Add the cherries to the chocolate sauce.

Serve over French toast, waffles, ice cream...you get the idea.

Cherry Fudge topping french toast


©2012- 2016 Adventures with Jude. All rights reserved. All text, photographs, artwork, and other content may not be reproduced or transmitted in any form without the written consent of the author. http://adventureswithjude.com
Related Posts Plugin for WordPress, Blogger...
Pin It button on image hover