Showing posts sorted by relevance for query ice cream. Sort by date Show all posts

Monday, December 28, 2015

Frozen No-Churn Coconut Dessert (I is for Ice Cream)


I think we have about twenty different styles of popsicle molds in our cabinet.  For a treat, Celia purees strawberries with a little sugar and pours the liquid into molds and freezes it.  It's hard to have a "bowl" of frozen strawberry because strawberry puree freezes pretty solidly, and churning into a true just doesn't happen.  I don't have room in my freezer to keep a churning bowl, or space in my cabinet for a machine (because it's full of popsicle molds!).

I've seen recipes for "no churn" ice cream that use whipped cream mixed with sweetened condensed milk.  I though it intriguing -- but it's totally a DIY project when you need a dairy free option, so I never tried it.  There is a new coconut-based whipped topping that Matthew can have, but I would still have had to DIY the sweetened condensed coconut milk.  This project got backburnered as a "someday" project, until my friend Kathy told me she found canned sweetened condensed coconut milk.  I had coconut cream concentrate, which I've can be whipped to a fluffy, whipped cream-like consistency, plus the new condensed milk. Back to the lab!

The coconut cream was a little finicky, because my kitchen was warm.  I did need to put it back in the fridge for about 3 minutes, but other than that it was fine.  I whipped the coconut cream until it was fluffy, then added the sweetened condensed milk.  A bit of rum (for both flavor and anti-freeze properties), and Celia had a bowl of "ice cream" that didn't need supporting players that take up half my kitchen.


No Churn Coconut Milk "Ice Cream"


Ingredients:

14 ounces coconut cream concentrate (I use two of these 7 oz boxes)
1 can sweetened condensed coconut milk
2 Tbsp light rum

Directions

1. Soften the packets of coconut cream concentrate in hot water just enough to be able to peel the packaging away.

2.  Add them to the bowl of your mixer.  Beat on low speed until the blocks are smoothed into a homogenous paste, then beat on high until doubled in size.  If your kitchen is warm, you may need to pop the bowl and beaters in the fridge for 3-5 minutes to firm the coconut oil back up.  You want it to remain fluffy, and not turn soupy.


3.  Add sweetened condensed coconut milk, and beat on high until combined.

4.  Add rum, and beat on high until combined.

5.  Spoon into a freezer-safe container.  Freeze for at least 30 minutes.


Allow the frozen "ice cream" to soften for about 5 minutes before scooping.
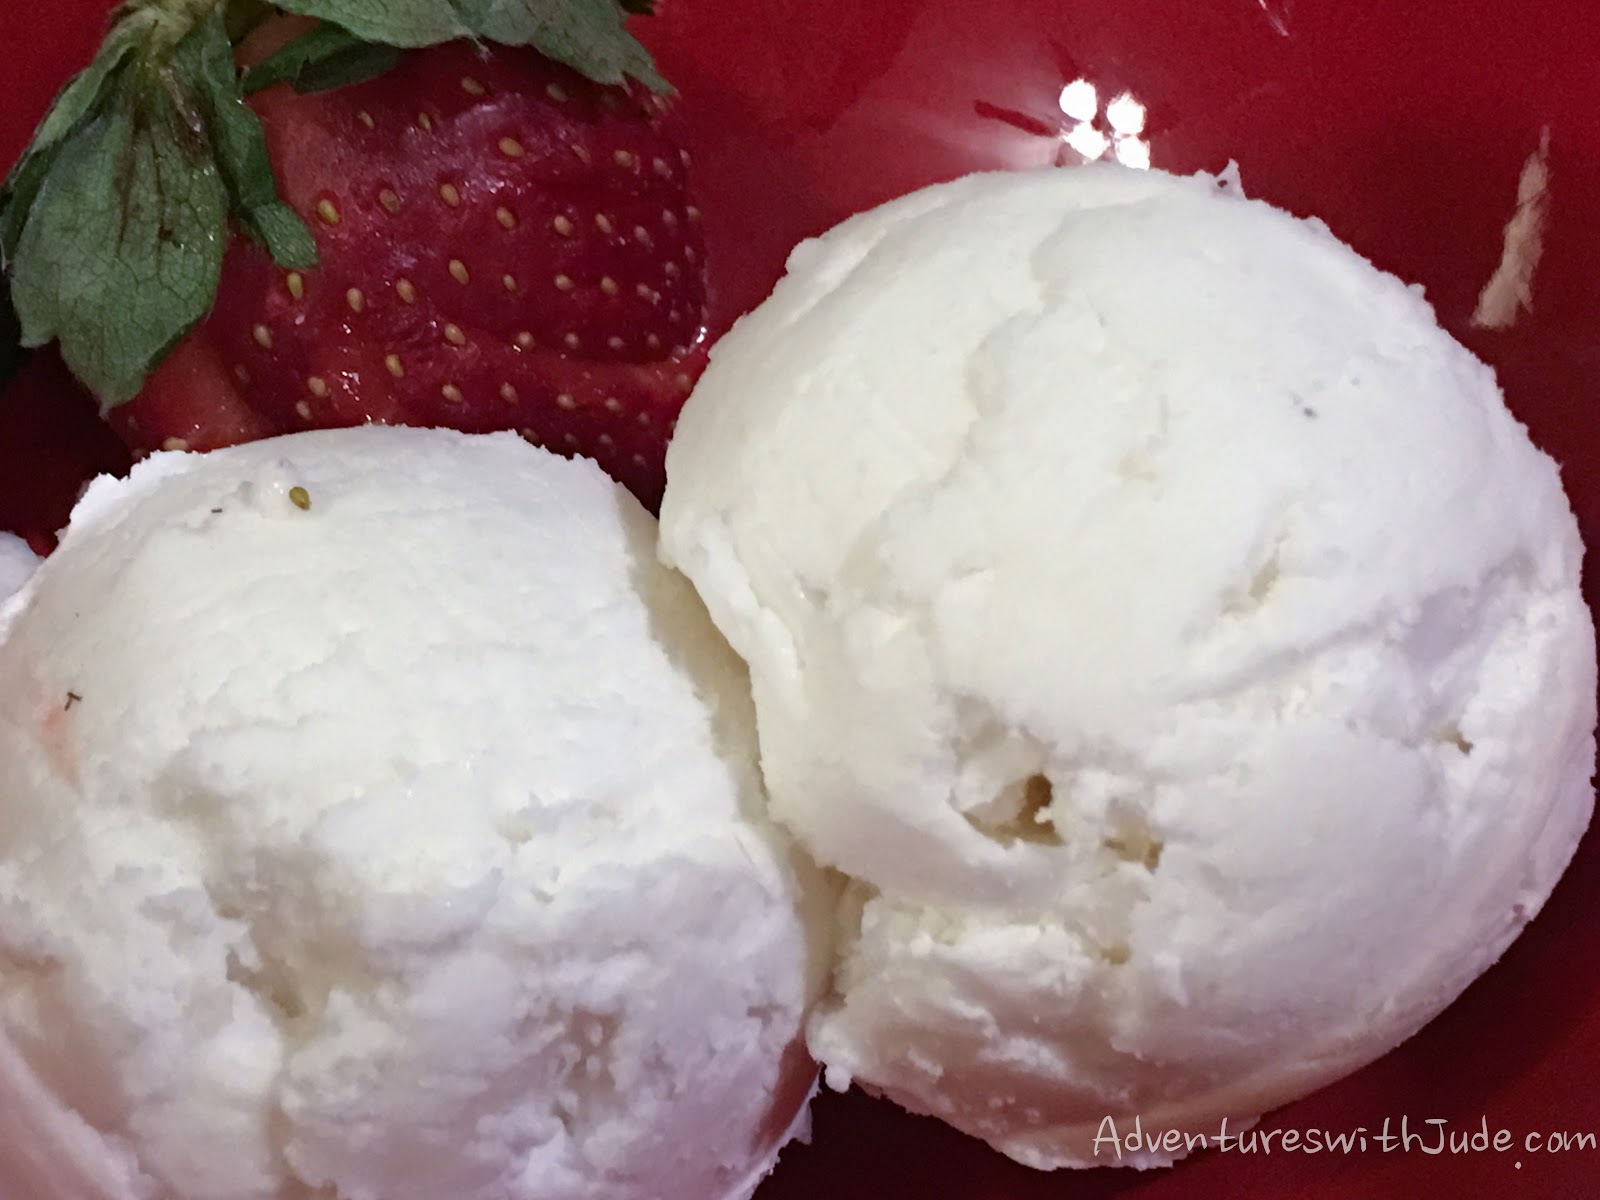


Next time, she wants to try mixing in chocolate chips...or chunks of strawberries...maybe some candied bacon...


©2012- 2015 Adventures with Jude. All rights reserved. All text, photographs, artwork, and other content may not be reproduced or transmitted in any form without the written consent of the author. http://adventureswithjude.com

Monday, March 14, 2016

Topped with a Cherry (T is for Two Ways)

Topped with a Cherry (T is for Two Ways)

The original theme for this week's post was going to be "T is for Topping".  Luke and I made cherry topping to go on chocolate waffles, making them into "Black Forest Waffles."

Black forest waffles

And when I said to him, "Can you please write up the recipe, and I'll write the rest of the post?" he emailed me a copy of his half of the post.

I was confused, so I read it a couple more times.  And then I said, "Luke?  I'm not sure where this recipe is from, because it's NOT what we made."  His response was, "Oh.  Well, I'm hungry anyway, so want me to just make this, too?"

Why not?

So now you get the benefit of cherry topping, made two ways.  The first uses frozen cherries, the second one calls for dried fruit.  Either one is good on pancakes, waffles, or french toast...or just atop some ice cream.

Black Forest Waffles 


Chocolate Waffles

Ok, I cheated.  They were made from a box of cake batter.  King Arthur Gluten Free, to be exact. Make according to the box directions, and bake in a waffle iron instead of an oven.

Chocolate cake waffles


Ice Cream

Vanilla ice cream from the grocery store for the dairy-eaters here.  The non-dairy kiddos had homemade coconut ice cream.

Cherry Topping

 2 - 12 oz bags of cherries
1 c. powdered sugar
1 Tbsp vanilla
1 Tbsp cinnamon

Directions:

Take both bags of cherries out of the freezer.

Put  one bag of frozen cherries in a pot.  Top with the powdered sugar, and stir to coat the fruit.  (This helps the starch in the sugar disperse into the liquid to help thicken it.)


Bring the mixture to a rolling boil, and and the vanilla and cinnamon.

Continue to boil until the syrup reaches the soft-ball candy stage (235°).  (Let the 2nd bag sit out to defrost while the first cooks.)

Add the second bag, and cook until the cherries are warmed through.  (The uncooked cherries add acidity to brighten the flavor, thin the syrup a bit as they defrost,  and larger pieces of cherry to contrast with the first bag that is cooked down and thicken the sauce.)


Spoon over waffles and ice cream.  Refrigerate any leftovers to serve with more ice cream, waffles, yogurt, etc.


Cherry sauce


Cherry Fudge Sauce


This sauce will be thin when it's first ready, but will thicken as it cools.  It becomes very fudge-like when it's cold.  I keep the leftover in a Mason jar in the fridge, so I can run it under hot water to return to a pourable consistency.

½ cup dried cherries
8 tablespoons Earth Balance Margarine
½ cup Enjoy Life mini chips
½ cup So Delicious coconut milk beverage
1 ½ cups powdered sugar
1 ½ tsp vanilla

Directions:

Place the cherries in a small bowl. Cover with hot tap water, and microwave on high for approximately 30 seconds. Let them stand in the microwave while you prepare the sauce.


In a large saucepan, melt butter and chocolate pieces over medium-low heat, stirring constantly.


Whisk in the powdered sugar.  The mixture will get very thick - almost gloppy.


Add milk and vanilla, and whisk until smooth.


Once the chocolate is smooth, remove cherries from the microwave. Pour off the soaking liquid from the bowl, and gently press the cherries to remove any excess liquid (use the back of a spoon or your hands). Add the cherries to the chocolate sauce.

Serve over French toast, waffles, ice cream...you get the idea.

Cherry Fudge topping french toast


©2012- 2016 Adventures with Jude. All rights reserved. All text, photographs, artwork, and other content may not be reproduced or transmitted in any form without the written consent of the author. http://adventureswithjude.com

Tuesday, March 26, 2013

Banana Ice Cream


One Ingredient Banana Ice Cream

Who doesn't like ice cream?

Frozen treats are always a challenge for food-allergy families. For many of us, commercial ice creams are not safe, and we often make our own treats. However, the hard part is most ice cream freezers need either significant freezer real estate and lead time, or specialty ingredients and equipment. Today, I'm guest posting over at the Kids with Food Allergies Foundation and sharing a recipe for banana "ice cream"!    It has one ingredient, four steps, and only needs a 4"x 4" space in the freezer.   It's also a very kid-friendly recipe - even a preschooler can help prepare it!  It's also a great alternative to banana bread for those lone extra-ripe bananas on the counter.   I hope you'll click through to check it out!


©2012- 2013 Adventures with Jude. All rights reserved. All text, photographs, artwork, and other content may not be reproduced or transmitted in any form without the written consent of the author. http://adventureswithjude.com

Tuesday, August 20, 2013

I'm melting - but they still want to eat!

I'm not really certain how people did it "in the old days."  I am in shorts and a T-shirt,  have my air conditioner cranked up (and if you touch it, I will smack your hand), and I'm still melting.  How women survived summer in petticoats and corsets is beyond me! I'm convinced August is the misery I pay in advance for October.  THAT is a month I could live all year with - short sleeve days and sweater evenings, not this hundred bazillion percent humidity stuff.

In this house, though, the kids' stomachs are like mail carriers -they make their presence known in rain, snow, hail, sun, humidity.  No matter the season or weather, they want to be fed!  I no more feel like turning on the oven than flying in the (barely a whisper) wind.  I'm tired of grilling, and so over the crockpot.  How about breakfast for dinner?  Waffles with ice cream doesn't need me to stand over the stove.  Dinner and dessert all in one!  With a refreshing honeyed watermelon side dish, it's a fantastic beat-the-heat dinner.


This is my waffle maker - the KitchenAid Pro Line Waffle Maker.  It makes two waffles every seven minutes.  (Gluten-free waffles seem to take longer to crisp up.)  I used to have a single-waffle iron, and it took forever to get enough waffles to feed everyone.  With this one, I can have dinner on the table in half an hour (and let the later batches cook while we eat - then if anybody wants seconds, they're piping hot).    If you have any leftover, place a piece of parchment paper between the wafffles and either place in a zip-top bag for the fridge - they last about 2 days - or wrap in foil and then bag for an up to 6 month sojurn in the freezer.

Gluten/Dairy Free Waffles - makes 10 Belgian style waffles


6 eggs
6 cups vanilla So Delicious coconut milk*
3/4 cup canola oil
2 Tbsp vanilla
6 cups King Arthur gluten-free flour blend*
2 Tbsp baking powder
1 Tbsp baking soda
1 Tbsp  xanthan gum


 *If you aren't avoiding wheat/gluten, use the same amount of all-purpose flour, and omit the xanthan gum.  You can also use any other milk-type liquid (cow's milk, soy, almond, etc.

Combine the eggs, milk, oil and vanilla in a large bowl.  Mix until the eggs are fully incorporated into the milk etc.

In a second bowl, combine the baking soda, baking powder, xanthan gum, and flour.

Mix the dry ingredients into the wet, and whisk to combine.


Pour into a heated waffle iron.  I pour a bit of the batter into a measuring cup with a spout, making it easier to control how fast the batter pours into the iron.  Bake about 7 minutes, or until the iron stops giving off steam.  DON'T open it before then - or else the inside won't be cooked and it will come apart and/or stick.  To borrow a phrase from my culinary hero, Alton Brown -- your patience will be rewarded.

If you want to add anything to your waffles,  the best way to do it so you don't get bits of things stuck in your iron is to add them to the batter once it's in the iron.  This way, there is a thin skin of batter that stays between the add-on and the cooking plate.  Blueberries and chocolate chips are our favorite add-ins. 


Remove from iron. Either serve immediately, or place in the oven.  (If you want them piping hot for butter & syrup, you'll need to turn the oven on to warm.  If you just want to keep them from being stone cold, toss a clean kitchen towel over them and stash them in a cold oven.)


You could top them with butter and syrup, but that is not nearly as fun as using them as the base of an ice cream sundae!  Finish your waffle by piling on ice cream, whipped cream, hot fudge or caramel sauces, and cherries.


To balance out the ice cream (and convince yourself that it's still a healthy meal), serve with fresh fruit.  Sometimes, I just put containers of whatever fruit we have on the table and call it done.  However, with it being so hot and humid, my basil plants have taken on lives of their own.  Watermelon and basil seem like an odd pairing (I used to think of basil as "the green stuff in spaghetti sauce") but it really does work!


Honey-Basil Watermelon Salad


1 medium watermelon
juice of 1 lemon
juice of 1 lime
1/4 cup honey
10 leaves fresh basil, plus garnish

Remove the rind from the watermelon and cut into cubes.   (Yes, if you want to be fancy, you could use a melon baller, but that type of froofy is lost on teen boys.)  Place in a serving bowl.

In a small bowl, combine lemon and lime juices. (If you don't have fresh and need to use bottled, use about 1/2 cup juice total.)  Add the honey and whip with a fork to get all the honey to mix into the juice.

Chiffonade the basil. 


Stack the leaves.


Roll them up.


Cut into fine ribbons.


Add the basil to the dressing and gently mix.  Pour over the fruit, and stir to coat.  Garnish with a sprig of basil, if desired.


Dinner is served, I haven't turned on the oven, and the kids think they're pulling a fast one by eating dessert "first."  Excuse me while I go eat mine - my ice cream is melting faster than I am!


It's a dinner party!


Photobucket Blogging Through the Alphabet Lydia's Flexitarian Kitchen


©2012- 2013 Adventures with Jude. All rights reserved. All text, photographs, artwork, and other content may not be reproduced or transmitted in any form without the written consent of the author. http://adventureswithjude.com

Monday, April 11, 2016

Kirsch & Cherries Sorbet for Grownups (W is for Water of Life)


The term aqua vitae, or "water of life," stems from the days of Roman Empire. If a soldier was in pain, a healthy dose left him feeling quite fine.  Poured onto wounds, it literally saved lives as it kept infection away.   It was around the Middle Ages, the term became synonymous with distilled spirits, such as brandy.  Every country and language has it's own native spirit: the grain-based Gaelic uisce beatha that we call "whiskey",  French eau de vies made from fruits and nuts, especially the popular apple-flavored Calvados brandy, traditional Russian vodka made from potatoes, and the German kirschwasser, or "cherry water." 

When Luke was taking his cooking classes, one of the sections specifically discussed  "desserts for grownups."  One of the recipes was for "Bachelor's Jam" - a concoction of summer fruits that are layered with brandy and left to ferment through the fall, then served with light cake.  Since it's currently spring (or so says the calendar -- the weather hasn't quite gotten with the program), there aren't any overripe fruits to ferment with brandy yet. We opted to turn some frozen cherries into sorbet.  It's an equally simple dessert - only five ingredients - but one that will impress guests.

Kirschwassser is a German distilled brandy made from fermented cherries -- think cherry wine that has been further refined.  This clear spirit has more of a cherry "aroma" than flavor.   Kirsch is very popular as an ingredient in fondues, black forest cake, and cherries jubilee, as well as both an aperitif (before-dinner drink) and digestif (served after dinner). It's very strong - usually 90 proof, or about 45% alcohol) and not sweet at all.  When I first tasted it, I was expecting something closer to amaretto than moonshine!

Perhaps kirschwasser served neat is a bit of an acquired taste, and I just have yet to acquire it!  However, as an ingredient, it is much softer.  The spirit bring out the alcohol-soluble flavors in the cherries, and boost their sweetness without making it cloying.  Lemon juice provides acidity and brightness. We froze ours in an ice cream machine and then let it set in the freezer to make a sorbet, but even just churned from the machine makes a darn good adult cherry slushy.  

Gaudete omnes! Cheers!

Kirsch Sorbet


3/4 cup sugar
1/2 cup water
10 oz cherries (we used frozen; if you used fresh ones, pit them first!)
1 cup Kirschwasser
juice of 1 lemon (about 1/4 cup)

In a smalls saucepan, heat sugar and water until sugar is dissolved.

NOTE: If you are using a machine like ours that has a built-in freezing compressor, you can continue immediately.  If you are using one  that has a put-in-the-freezer-first bowl/core, refrigerate the syrup until cold.

Place cherries, Kirsch, and lemon juice into a blender.  Add the (cooled) sugar syrup, and puree until smooth.


 Luke says, "NOTE TO SELF.  Blenders work better when they're plugged in!" 

 If you're using frozen cherries, you can probably go directly to the machine, but if you're using fresh ones, chill everything down about 3 hours.

Pour into your ice cream machine and follow the manufacturer's instructions for freezing .  Ours took about 40 minutes to churn.


After it's frozen, either serve immediately (it will be very soft) or put in a covered bowl and freeze until firm.

If you don't have an ice cream machine, you can make a granita-like desert. Place the puree into a 9x13 glass dish and cover with plastic wrap.  Freeze for about an hour, or until the edges are firm.  Stir, and return to the freezer for about 2-3 hours, stirring every half hour or so.  If you want an icy dessert, serve directly from the dish; if you'd like yours smoother, put it back in the blender and puree for a minute or two.

Serve this as an intermezzo, dessert, or digestif.  Kirsch is so potent that it is only served in 1-2 ounce pours, so with a whole cup in this recipe, you don't want to dole out large bowls!  It might seem a little stingy to serve tiny demitasse-sized cups or glasses, but believe me -- much more and your guests may be wobbling from the table!


©2012- 2016 Adventures with Jude. All rights reserved. All text, photographs, artwork, and other content may not be reproduced or transmitted in any form without the written consent of the author. http://adventureswithjude.com

Monday, January 25, 2016

Vegan Chocolate Fudge Sauce (M is for Mocha)

Celia just began a new food trial last week - coffee! At first, we thought that maybe it seemed like a "waste" of a trial, because it's not like coffee is a nutritional powerhouse or anything. However, it is something that would give her a new flavor. I've seen lots of recipes for a coffee "spice rub" for pork, and it would be something nice to add to ice cream base.  Plus, it's something that is pretty ubiquitous -- every restaurant and gas station has it.  Obviously, creamer isn't an option for her (dairy or soy!), but black with sugar is definitely doable.  I mentioned that she could even get that as a treat at Starbucks with Daddy, and her eyes turned wide as saucers:  "You mean you can get a PLAIN COFEE at Starbucks?"  Hard to believe, but yep, you can!

So far, she's doing OK with it. Two more weeks with no reaction, and she gets to keep it "for good." Although she prefers it with a bit of coconut milk as well, she does like it with just a bit of sugar, and is enjoying sampling lots of coffee.


Her brother's favorite coffee drink is a mocha frappe, and she wanted to try one with "her" ingredients.  I made this chocolate fudge sauce for her to add to a blenderful of coffee and ice...and apparently on top of her ice cream, and strawberries...and to dunk her bacon in...  This week's Blogging through the Alphabet theme may be "M is for Mocha", but she's pretty much decided that fudge sauce is pretty good on nearly everything!

Vegan Chocolate Fudge Sauce

1 can (11.5 oz) sweetened condensed coconut milk
1/4 cup cocoa powder
1 tsp kosher salt

Heat the coconut milk until it begins to steam, and add the cocoa powder.  Whisk briskly to combine. Add the salt and whisk again.

For a hot mocha, add 2 Tbsp of syrup to 8 oz of coffee.  It will be sweet and chocolatey, but not overpowering the coffee flavor.  For everything else, just spoon it on to taste.  (You can re-warm it to make it more syrupy for mixing into coffee, or leave it chillled for a more fudgy consistency.)


Store in a glass jar for up to a week, but it probably won't last that long.


 ©2012- 2016 Adventures with Jude. All rights reserved. All text, photographs, artwork, and other content may not be reproduced or transmitted in any form without the written consent of the author. http://adventureswithjude.com

Thursday, April 10, 2014

Country Dinner Recipes (Homeschooling in the Kitchen)


Homeschooling in the Kitchen: Country Dinner
With this "Country Dinner" meal, I was introduced to two new techniques - braising and a one-dish cake. Braising is a cooking method where food is partially submerged in a flavorful liquid and cooked slowly at a moderate temperature so that connective tissue and collagen breaks down and helps tenderize tougher cuts of meat. This cake is perfect for when you want a sweet treat with minimal cleanup. You can mix, bake, and serve all in the same dish.


Braised Pork Ribs


Ingredients:

2-3 pounds pork spare ribs

Sauce:
2 quarts (32 oz total) canned tomatoes (you can substitute 1 large ~33 oz can of tomatoes)
2 tbsp garlic
1 tbsp chili powder
1 tbsp salt
1 tbsp black pepper
¼ cup light rum (optional)
1 cup packed brown sugar

1. Gather ingredients and wash hands. Turn oven on to 350°F

2. Preheat an oven-safe Dutch Oven on medium heat.

3. Brown meat in heated Dutch Oven in batches. (Don’t overcrowd the pan or put ribs in more than one layer, or the meat will not brown.) Brown the meat on each side for about 2 minutes per side. Remove from pan and place on a baking sheet. Repeat until all ribs are browned. Remove pan from heat.


4. While meat is browning, prepare the sauce. Place tomatoes, spices, rum and sugar in a blender and puree until smooth.

5. Pour ½ cup of sauce in empty Dutch Oven. (Be careful because the liquid will sizzle and boil up.) Use a wire whisk to scrape the fond* up into the sauce. *The fond is all of that browned bit of stuck-on meat and caramelized juices. There is a lot of flavor in here.

6. Pour the rest of your sauce into Dutch Oven, and whisk to combine the caramelized sauce and fond with the rest. Return the ribs to the Dutch Oven, nestling them into the sauce. Cover with a lid and cook in the oven for 2 ½ - 3 hours, or until meat pulls away from the bone easily.

 Before

 After

7. Serve with baked potatoes and blueberries.

Note: This can also be prepared in a large slow cooker, but you'll need to brown the meat separately, deglaze the pan, and then put the meat and sauce into the slow cooker.  Cook on Low for 6 hours or on High for 4.

Hot Fudge Sundae Cake


Hot Fudge Sundae Cake #glutenfree #dairyfree #vegan


Ingredients:
 
Cake:
1 cup King Arthur Gluten-free multi-purpose flour
1 tsp xanthan gum
¾ cup granulated sugar
2 tbsp baking cocoa
2 tsp baking powder
¼ tsp salt
½ cup So Delicious coconut milk
2 tbsp canola oil
1 tsp vanilla

Topping:
1 cup packed brown sugar
¼ cup baking cocoa
1 ¾ cups very hot water

1. Pre-heat  oven to 350°F.

2. Mix the flour, granulated sugar, 2 tablespoons of the cocoa, the baking powder, and salt in a 9” round Pyrex pie plate. Combine with a fork. 

3. Stir the coconut milk, oil and vanilla in a separate mixing bowl.

4. Pour the milk mixture into the pie plate. Combine together with a fork until the batter is smooth. Spread evenly in pie plate.


5. Sprinkle the brown sugar and the other ¼ cup cocoa over the batter.


6. Place the pan on a foil-lined baking sheet on the middle rack of the oven. (You are going to pour the water into the pan next, and it’s easier and safer if you don’t have to carry it across the kitchen and risk it sloshing. The baking sheet is so if it bubbles over, you are only cleaning the sheet, not your oven.)

7. Pour the water evenly over the topping. DO NOT MIX the water in. Just shove the rack into the oven and shut the door.


8. Bake for 35-40 minutes, depending on your oven, or until the top of the cake is dry.

9. Serve the warm cake in dessert dishes. Top with ice cream if desired, and spoon some of the fudge sauce in the bottom of the pan over the cake and ice cream. Enjoy!


Other posts in this series:
Real Men Make Quiche
Planning Meals
Food and Kitchen Safety
Mis en Place and other final prep

April Blog Hop
This post is part of the Schoolhouse Crew Review 5-Day Blog Hop.  There are over 60 families blogging about just about everything homeschool related you can think of.   Here are some friends you might like to check out (and what they're writing about):

Nicole @ Journey to Excellence ~ Missouri
Dusty @ To the Moon and Back ~ Babywearing
Kristi @ The Potter's Hand Academy ~ Spring Studies
Jennifer @ Royal Little Lambs ~ Essential Oils
Annette @ A Net in Time ~ Science
Jen @ Happy Little Homemaker ~ Frugal Fitness
Meg @ Adventures with Jude ~ Homeschooling from the Kitchen
Lori @ At Home: where life happens ~ Favorite Books
Tauna @ Proverbial Homemaker ~ A Christ-Centered Home

If you have a few extra minutes and would like to check out all of the blogs in the hop, click on the banner at the left!


©2012- 2014 Adventures with Jude. All rights reserved. All text, photographs, artwork, and other content may not be reproduced or transmitted in any form without the written consent of the author. http://adventureswithjude.com
Related Posts Plugin for WordPress, Blogger...
Pin It button on image hover