Sunday, May 31, 2015

Easy Piano Basics from JazzEdge (A Schoolhouse Crew Review)


Review of Easy Piano Basics from JazzEdge

Celia is my "musical" child.  All of her brothers love music as well, but more as listeners than players. Celia, however, has been taking violin lessons for four years now, and recently expressed an interest in learning how to properly play the piano. When we had the opportunity to expand her instrument repertoire with lessons with the Easy Piano Basics program from Willie Myette and JazzEdge, she was excited to learn how to do more than just pick at notes. 

If you'll recall, we reviewed HomeSchoolPiano last year, and it made a huge impact for Jude.  I really liked Willie's teaching style, and thought it would suit Celia as well.  This program is a bit different, however.  While HomeSchoolPiano is a more rounded program that includes rhythm and ear training alongside mechanics, Easy Piano Basics is almost pure playing technique, with only enough musical theory to support playing.  It's a just over 30 lesson "crash course" in how to play the piano.

http://easypianobasics.com

Depending on how quickly you go through the lessons, actually playing within a week is more than possible!  All you need to use these lessons are an internet connection (any web-enabled device will work to stream the videos, or you can download them to save for later) and a piano or keyboard.   Celia usually did three or four lessons at one time.  Each video is less than 10 minutes and her usual lessons for violin are 20 or 30 minutes (depending on which teacher she is working with), so this length felt comfortable for her.  She found that she preferred a larger chunk of learning at once with a group of things to practice for several days, rather than one short lesson each day.  Celia is familiar with the mechanics of playing a piano, but had zero technique. She really was playing the piano - not just picking - two days in.


Here's where things got interesting for us.  All of my kids have decreased muscle tone, and together have logged thousands of hours in the PT gym.  One of the first things Willie focuses on is sitting properly at the piano, and using good posture.  Celia discovered that her posture was terrible - she's so used to hunching over (especially to balance the backpack that holds her feeding tube gear).  We finally had found a way to give Luke a "final exam" for his PE credit (most of his "logged hours" were in the PT gym/doing his home program).  He now was charged with being Celia's "personal trainer." 


Sitting at a backless piano and maintaining proper posture is hard, even if you aren't used to slouching to counterbalance a 5 pound backpack for hours on end.  If you have a student who needs to "see" how one lesson affects another activity, learning an instrument definitely shows the need for a strong body, and is a good tie-in with physical education.

Back to the piano...

What I'm impressed with is how quickly Celia is making the connections between instruments.  Obviously, she isn't playing the violin "two-handed," and after four years, she knows how to play scales on it. However, it was like a lightbulb went off when she realized she could play "skips" on the violin.


She's been practicing them "in real life," too.  Her recital piece is Bach's Minuet No. 2.  It's filled with scales and skips. 


By now, Celia is playing real songs at the piano. I think this is incredibly motivating for her.  I know that when she practices her violin, she gets incredibly frustrated by the "exercises."  Yes, they are very important for building a foundation, but she's definitely more motivated to practice by playing an actual piece of music. Last year, she learned how to play "In the Sweet By and By" on her violin. Now, she can play it on the piano as well.  It's a good piece for her to work on playing with two hands, because it goes back and forth between hands and fingers in addition to simpler passages of just scale work. 


While the focus of the program is getting hands on the piano and playing, there still is ample music theory to explain what is going on.  The program doesn't get bogged down in all the reasoning, but you learn enough to transfer the information, either to another instrument or to a more in-depth piano study if you choose to learn more than basics.


Most piano pieces are played in a chord format.  This basic example of what chords and triads are, and practicing "common" ones helps prepare the student for playing several notes at one time in a repertoire piece.


Before you think, "Oh gosh, look at all the songs she's learned so quickly!  Are we going to have to buy a ton of sheet music, too?"  The answer is, "Well, no and yes."  To use the Easy Piano Basics program itself, the answer is ,"No, you won't need anything extra."  Included in the program is a downloadable 46-page PDF book, filled with all the sheet music you will need to learn the piano and to practice the exercises.  The "yes" part is if your student wants to increase their repertoire and wants to put lessons to practical use.  However, most of the "extra pieces" practice Celia has done has been with music we already have, so if you're learning piano as a second instrument, you likely already have enough supplemental sheet music.  If you're new to learning any instrument, or don't have extra music, one or two pieces that are simple but something you want to learn will suffice - you don't need an entire music library.

Very rarely do I comment in my reviews about the price of a program, because "value" is in the eyes of the person holding the checkbook.  However, I have to comment on this one.  The price tag for this program is currently $59.95.   There is no way you can get a private instructor to teach you so much for so little!  Even bundling the lessons into half-hour increments as Celia did, from start to finish, you're looking at close to 10 lessons.  You can't get quality lessons - that you take at your convenience and pace - for under $6 per hour!  In addition, this is a purchase-and-it's-yours program.  If it takes ten weeks for something to click (and for some people - like me! - coordinating eyes, brain, and fingers does not come naturally), it's no problem, because there's no "you've got to push through, we're running out of membership time and will have to pay again." Plus, because it is yours "forever," it can be used for multiple students, further increasing the value.

We are extremely happy with Willie Meyette's piano programs.  Easy Piano Basics was perfect for Celia's needs, teaching her how to play the piano properly without an overabundance of repeating what she has learned in the past from her violin lessons. For more information about Easy Piano Basics, go to the program website or follow on social media outlets listed below.  To read other reviews about Easy Piano Basics and other programs from JazzEdge, click the banner to read the Crew Reviews. 

Facebook: https://www.facebook.com/PianoWithWillie
Twitter: https://twitter.com/PianoWithWillie
Pinterest: https://www.pinterest.com/jazzedge
YouTube: https://www.youtube.com/user/JazzEDge
Vimeo: https://vimeo.com/jazzedge


JazzEdge Review


©2012- 2015 Adventures with Jude. All rights reserved. All text, photographs, artwork, and other content may not be reproduced or transmitted in any form without the written consent of the author. http://adventureswithjude.com

Thursday, May 28, 2015

Does Distance Affect Speed?


In an effort to get Matthew more invested in his work, I assigned him to find several science labs that he could do with his brothers.  There were a few rules:

1. Do not blow up the house.
2. Do not launch your brothers into outer space.
3. Do not make me take anybody to the emergency room.

After the gleam in his eye, I added a codicil: Do not do anything that you will need to explain to an insurance adjuster.

He pulled out a few books and started looking through them. The book gave him ideas and general instructions, but I assigned that he needed to write me a full lab report.  After he gave me his "finished" report, we had a discussion of what my idea of a "final report" is vs. his.  We have a bit to go on reconciling expectations, but we'll get there.

The first experiment he chose was from the physics section.  Jackpot!  Luke is doing physics as well, so we swapped out brothers; instead of Jude and Damien for lab partners, Matthew had Luke and Jude.  Once the data was collected, Matthew got to do the easier calculations, while Luke got the more technical ones.  Both boys were right, but for different reasons.

Does Distance Affect Speed?

Hypothesis: If the height from one end to the other is higher, then the water will flow through faster.


Materials: 

short hose (about 4')
a friend
two bowls with quart markings
stairs
water
stop-watch
a way to prime the small hose, if necessary (we used our regular garden hose)


Procedure:
  1. Fill up one bowl with water and place it on the top step.  Put the empty one on the bottom step/landing. 
  2. Prime the small hose, if necessary.  (If all the water ran out of it while moving it, you'll need to prime it.)  Fill it with water  - we held it end-to-end with a garden hose, turned on the tap until water came out the far end of the short piece - then turn a kink in an end to maintain the vacuum.


  3. Put each end in each bowl, straightening the kinked end once the "wet" end of the hose is submerged.
  4. Time how long it takes to fill get the bowl at the bottom of the steps to the two-quart line. 
  5.  Kink an end to keep the hose primed to repeat the experiment.  
  6.  Refill the bowl at the top of the stairs with the contents of the bottom bowl, and move the filled bowl to a lower step.
  7. Repeat steps 2-4.
  8. Empty bowls and put materials away.

Data/Calculations:

Matthew, calculating water speed:

Distance traveled: Ideally, you'd measure each step to get accurate readings.  If you want to do that, you'll need a tape measure.  Since the "junk drawer" swallowed ours, we just went with standard construction measurements. (Not something you want to do if you're trying to find runoff rates, etc., but for academic purposes, it was good enough.) The standard "run" of a stair step is 11.5 inches, so to find out the total distance traveled, multiply (11.5 x the number of steps traveled), then convert it to meters.  Do this for each round of experiment.

We know how long it took for each one, because we used a stop watch.


To calculate speed, divide the displacement, or the total distance traveled in meters,  by the seconds required to travel said displacement. 

When the bowls were five steps apart, the water took 14 seconds to travel from one bowl to the other. By multiplying the standard length by the five step difference, we get a total distance of 57.5 inches, or 1.46 meters.  Since speed is equal to the displacement per second, we divide 1.46 meters by 14 seconds, which gives us approximately 0.1 meters/second that the water traveled. 

When the bowls were three steps apart, the water took 90 seconds to travel between bowls. If we again take the standard length and again multiply it by the three step difference,  we get a distance of 34.5 inches, or approximately 0.87 meters. By dividing 0.87 meters by 90 seconds and rounding, we get approximately 0.01 meters per second. 


Luke, calculating the slope of the hose:

The slope of the hose affects how fast the water will come out.  The steeper the slope, the more gravity will affect the water, and it will come out faster.  If the slope is more flat, gravity will have less of an effect.

Slope is calculated by dividing the rise over the run.  Using standardized figures, the rise of each step was 7.75 inches, while the run was 11.5 inches.

Normally, the slope can be easily altered by adjusting the height or the length. However, the standardized stair size remains constant, and the 90° angle made by the the stair flight stays constant as well.  While the flight size itself changes, as long as the angle made by the stair in comparison to the ground remains the same, the measurements of the corresponding sides of both triangles will be proportional. So, if you find the slope of one stair, you have found the slope of the whole flight as well. Calculating slope to be rise over run, or 0.19685 meters divided by 0.2921 meters, we get a slope of approximately 0.02 meters. 

While the slopes remain constant, the velocity will not.  We know from Matthew's calculations that the speed of water in the second experiment was significantly slower.  The slope is the same, so the speed should be, right?  Or, it should be less time for the lower steps, because the water isn't traveling for as long a distance between the top of the stairs and the bottom. Here's part of why it isn't:  the distance the hose is traveling changes, but not the distance the water is traveling.

In addition, the hose has a definite length, so as the distance over the shortens, the hose coils up. The water is still traveling through the same length of hose as before, but now has to go against gravity in some parts in order to continue to travel through the hose.  Since gravity has a major effect on speed, a coil will causing the water to take longer to travel the same distance as before.  Velocity = mass x acceleration , but gravity increases acceleration proportionally to the distance fallen.  If you look at a playground slide, a corkscrew slide looks like you will go faster, and the ride be more intense, because of its rotation.  However (assuming the sliders are of equal mass, and the actual length of the slides are equal), a straight slide is going to run "faster" because gravity has a greater effect when there is no lateral motion to impede it.


Conclusion:

Our  hypothesis was correct because when the bowl was 5 steps higher than the empty bowl it went faster. 

Matthew: Yes, distance does affect speed of the water.
Luke: Distance affects speed, but what affects it more is how vertical that distance is.


©2012- 2015 Adventures with Jude. All rights reserved. All text, photographs, artwork, and other content may not be reproduced or transmitted in any form without the written consent of the author. http://adventureswithjude.com

Monday, May 25, 2015

We remember.

Most monuments to soldiers remembrances include a line from Horace: "Dulce et decorum est pro patria mori." - "Sweet and righteous it is to die for one's country." True? Yes. But these markers also are reminders of a greater gift. Not freedom, but love. 

"No greater love is there than to lay down one's life for a friend." 

Thank you, friends.

 Fort Necessity, PA


 Breed's Hill
Boston, MA


 Antietam National Cemetery
Sharpsburg, MD


 Gettysburg, PA


Tombs of the Unknown Soldiers
 Arlington, VA


 Arlington National Cemetery
Arlington, VA

Korean War Memorial,
Washington, DC

USS Albacore Memorial Garden
Portsmouth, NH


4,048 Gold Stars, WWII Memorial
One star for every one hundred soldiers killed or missing in WWII
Washington, DC

Ground Zero
New York, NY


Thursday, May 21, 2015

Tandoori Chicken and Coconut Rice - Dairy Free

Tandoori chicken is a dish that originates in India and Pakistan. It gets its name from the clay tandoor oven that is traditionally used to cook it. Meat - usually chicken - is marinated in yogurt and spices to give it flavor, and then baked. I tried it for the first time when our family ate at Sanaa, an Indian-themed restaurant at Disney’s Animal Kingdom Lodge. I was a bit nervous at first, but when I realized it was basically spicy roasted chicken, I ordered it. It quickly became my favorite dish of the trip, putting it on my “try this at home” list.


Unlike most marinades, the yogurt mixture is not wiped off the meat after its marinade, but left clinging to the meat to help give it a flavorful crust. Tandoori chicken can be extremely hot and spicy (often its red color comes from cayenne or other pepper used in the marinade), but while this recipe does call for a mountain of spices, it does not taste like edible lava. There is only a small amount of cayenne pepper, which is spread among a fair bit of chicken, making it mild enough for less adventurous palates. Feel free to add more heat if you prefer spicier foods, either more cayenne powder, or even adding a hot pepper to the aromatics in the blender. A shot or two of sriracha, an Asian hot chile pepper sauce, will seriously ramp up the heat as well. (You might want to put that on the table, rather than the marinade. THAT stuff is edible lava.) The recipe looks like a lot of effort, but trust me -- it’s just a lot of baby steps that mature into a great dish.

Oh - and watch it with the turmeric. It stains.


Chicken Tandoori with Coconut Rice

Serves 6-8

Chicken & Marinade:


4 pounds chicken thighs (about 10 thighs), skin removed
2 small onions
8 garlic cloves
1 cup coconut yogurt
¼ c. freshly squeezed lemon juice (about 2 lemons)
3 Tbsp cumin
3 Tbsp garam masala
2 Tbsp coriander
2 Tbsp ginger
1 Tbsp cayenne pepper
1 Tbsp turmeric
1 Tbsp salt
1 Tbsp black pepper
3 Tbsp olive oil

Coconut Rice


1 small onion, finely minced
4-6 garlic cloves
1 Tbsp salt
3 cups Basmati rice
1 quart chicken stock
1 - 13 oz can Coconut milk

Fresh pineapple, diced, for garnish (optional)

Directions for the chicken:

  1. On each thigh, remove and discard the outer skin. Place the skinned thighs in a large mixing bowl. 
  2. Peel onion and cut in half. Remove skin from garlic. Place into a blender and pulse until coarsely chopped. 
  3. Add yogurt, lemon juice, and spices to the blender. Puree until smooth.
  4. Add olive oil to marinade and blend until mixed in, scraping down the sides of the blender as necessary. 
  5. Pour the marinade over the chicken, and toss to coat. as much of the chicken possible. You can do this with tongs or a spoon, but honestly -- the easiest way is to just use your hands. 
  6. Cover with plastic wrap, then allow the chicken to marinate for 1 hour. (Store it in the fridge! You can let the chicken sit for up to 4 hours, but more than that and it will get mushy from the acid in the marinade.) 
  7. While the chicken marinades, begin to prepare the rice. (see below for directions) 
  8.  Preheat your oven to 375ºF and line two baking pans with aluminum foil. Divide the chicken among the two trays, leaving the marinade on it. 
  9. Bake chicken for 35 minutes or until it reaches an internal temperature of 165°F.

 Directions for the Rice: 


  1. About an hour before you're ready to cook the chicken, preheat a 3-4 quart saucepan over medium heat, and mince the garlic and onion. 
  2.  Add about 2 tbsp of olive oil to the pan, and heat until it shimmers. Add your onion and 1 tbsp of salt, and sauté until the onion begins to caramelize. Once the onion has started to caramelize, add your garlic and saute until the garlic is fragrant. 
  3. Remove from heat and cover the aromatics with a lid. Let it rest, covered, until the chicken is ready for the oven.
  4.  When you place the chicken in the oven, return pot to heat. Allow it to reheat until vegetables are sizzling. 
  5. Add 1 tbsp olive oil, and stir. Add rice. Stir to coat with oil/aromatics, and saute until rice starts to toast.
  6.  Pour in 1 quart (8 cups) chicken broth. Stir and bring to a boil, allowing rice to soak up most of the broth. 
  7. Shake the can of coconut milk vigorously to combine coconut cream and coconut. Add to rice and turn heat to low (liquid should barely simmer). 
  8. Cover and allow rice to cook for about 25 minutes. Stir once or twice during cooking so the rice doesn’t stick to the bottom of the pot. 

 To serve, lay chicken over a bed of rice, and garnish with chopped fresh pineapple.

Dairy free Gluten free tandoori chicken and coconut rice


 ©2012- 2015 Adventures with Jude. All rights reserved. All text, photographs, artwork, and other content may not be reproduced or transmitted in any form without the written consent of the author. http://adventureswithjude.com

Wednesday, May 20, 2015

Homeschool Legacy Unit Studies (A Schoolhouse Crew Review)


Coming from a brick-and-mortar school background, I've long considered each subject independently: math is math, reading is reading, history is history.  While there is some overlap - reading the math problem, calculating how many years since the Declaration of Independence was signed - seeing the "whole concept" was not my norm.  The longer we've homeschooled, the more I find myself drawn to the "unit study" concept.  In this manner of study, you choose a topic and then explore it from different angles.  (Pun intended -- including geometry!)  However, sometimes you still need to teach the "individual subjects" in order to meet core requirements.  Homeschool Legacy has created a number of "Once a Week Unit Studies" that allow you to balance the need for topic-specific teaching with global learning.  We had the opportunity to review their medieval-themed Knights & Nobles unit study and had a fantastic time.


What sets the Homeschool Legacy unit studies apart is their "once a week" approach.  Instead of teaching all academics though a single theme, Homeschool Legacy's studies allow you to use your favorite curricula for your core topics (math, science, reading, etc.) and then put them to use during a single concentrated "Unit Study" day.  Step-by-step instructions are given, and a focused curriculum laid out, so that you have simple before-and-after activities and get the most out of your one unit study day.  I had been looking for a history program for Jude - he has long been drawn to a history-based method of learning.  In the past, we have generally focused on American history, so the Medieval era was new to him; however, like many little boys, knights and castles fascinate him.  As an adult, I can appreciate the beauty of these ruins, and the amazing ingenuity that the people of this period needed to survive.  In addition, Matthew is working on a World History program.  This unit study helped pull him out of the "names and dates" mindset and round his studies with the culture of the people.  The Knights & Nobles unit study cover states it is for grades 2-12, and I admit to some serious skepticism.  It's hard for a course to be simple enough for a young student but meaty enough for an older one, but I figured for a four-week program, it was worth a shot.

"Wow!" is about all I can say.  I think Homeschool Legacy is my new favorite company.  We had a fantastic time with this program.

A schedule is laid out, but it's only a suggestion.  I liked how flexible these were.  Jude (and Damien) tended to do a little bit of activity each day, finishing the week mostly "on time."  Matthew took longer, but also dug deeper.  Rather than a group read-aloud (which would take us far longer than the week due to attention spans), Jude read the books that were more at his academic level, while Matthew was assigned the "group" book as a literature assignment, and I purchased (independently from the review) some study guides to go along with them to round this out.  Some of the books we read include:

The Door in The Wall by Marguerite DeAngeli (Progeny Press study guide)
Many Moons by James Thurber
Designs from the Book of Kells  by Judy Balchin
The Three Musketeers  by Alexander Dumas  (7 Sisters Homeschool study guide)
The Knight at Dawn by Mary Pope Osborn (Magic Treehouse Series #2)

Each week has 10-15 books to choose from. Most can be found at your local library; we even borrowed The Three Musketeers as an audiobook from Amazon (we are Kindle Unlimited members). However, there is no need to read all of them. The author suggests you think of these lists "as a buffet" - everyone can choose his favorites, but none is left hungry.  We found for Matthew, one big piece of classic literature was enough for him to handle, while Jude read several stories.

Each week focuses on a different topic. I really liked this.  I felt that it gave each topic an opportunity to really be explored.  For example, one can explore medieval castles in just one day, and if you wanted to just have more of a simple/overview course, you certainly could.  However, there is so much to be learned.  We found having a focused topic allowed us a secure foundation to work from.  For example, while we went down several "rabbit trails" with castles, knowing that we had a wide variety of resources for them and that we would get to the people who lived in them eventually, we felt like we could focus on these incredible fortresses without feeling like we had to learn about the building and the defending knights and the king and queen and what they did for fun and what they ate simultaneously.

As written and outlined, I think "one-day-a-week" (or its equivalent) is a great "overview" pace, especially if you have a student who is studying Medieval times just to tick that box on the syllabus.  However, we found that we loved the era so much that "one day" just wasn't enough! We broke "one-day-a-week" into parts over the course of one - or even three! - weeks, allowing us to really dig deeply into topics.  While this is intended to be a four week course (with an optional fifth week of activities), we have spent six weeks on the first three lessons. You certainly don't need to do every bit of reading and activity listed, but we found that there was plenty of variety to what was listed that we could do more activities and not feel like we were reading the same thing.  If you didn't want to dig deeply all in one go, you certainly could use it as a spiral-type curriculum, working on some of the activities the first time with a younger student and revisit with an older one.  As for having two students of very diverse levels (three if you count kindergartener Damien, who enjoyed the lessons as well!), it was easy to balance them and keep them in the same "area" of study.  For example, while Matthew read one larger book over two weeks,  Jude (and Damien) read some of the more age-appropriate books, three days per week rather than daily.  (And we did find a couple extra videos, such as this gorgeous stop-animation series on the history Colm Cille to add in while Matthew was still working on his activities.) 

Week 1 took us much longer than "intended."  Instead of a single day (week), we spent a full two weeks!  While the sections focuses on castles, but also includes the Gothic Cathedral.  We spent a full week working on the medieval fortress castle and seeing how it evolved from a sparse fortress to the incredible "fairy tale" buildings we think of today, but then allowed a second week to focus on the beautiful "castles of God."

For the castle studies, we read books about them, watched movies about castles, and were lucky that we had recently been to Castillo de San Marcos - the oldest Bastion fort in the New World.  We had a chance to re-explore the castillo (the Spanish word for castle) through our photos, and talk about the practical features of these structures.


We then took a week to study the Gothic Cathedral.  These beautiful churches were as important as castles.  If the castles saved the peoples' bodies from danger, the cathedrals saved their souls.  One of the suggested activities is a field trip to look at the stained glass windows of a church.  These exquisite structures let in light, both physical and metaphorical.  Many of the worshippers - most, really - were illiterate and these gorgeous windows allowed them to learn stories from the Bible with pictures. We were blessed with a "virtual" field trip.  Neal's parents were in Europe at the same time we studied these, so every day we checked Facebook to see where they had been.

Our Lady of Strasbourg Cathedral, France

Mimie at Cologne Cathedral, Germany
Stained glass windows, Cologne Cathedral

Inspired by their photographs, we then did our own stained glass projects. While Damien and Jude focused more on just creating beautiful pictures, Matthew was assigned to create a "window" in the same style - one that would allow a story to be seen.


(Leave a comment if you can tell the story being retold!)


In addition to reading and hands-on activities, a classic game or movie for each topic was suggested.  Chess and draughts (checkers to us modern folk) were on the list - some of our favorites.  During the "Kings and Queens" week, we watched A Connecticut Yankee in King Arthur's Court starring Bing Crosby.  Jude absolutely loved it.  (So did I - there is a reason why Bing Crosby is a classic.)


All of the videos and films are available via Netflix.  We don't have a Netflix membership, though, but it wasn't an issue.  Most of the videos assigned are also available via YouTube.  However, what I liked is the flexibility of this program.  If you couldn't find a specific video, it was easy to substitute something on the same topic.  While A Connecticut Yankee... is classic Americana, you could substitute another King Arthur-themed movie.

We are currently working on Week 3: Knights.   Knights began their training as pages and squires, training for many, many years in both chivalrous character and as soldiers.  We have a family business that Luke has begun working in, and Matthew pitches in at times, too.  They have their own knightly mentor - Sir Pop Pop.


In addition to history and art, science is incorporated into the program.  Check out our catapult. Similar styles were used to launch large projectiles as well as smaller shrapnel when laying siege.


Though not one of our homeschoolers, Celia didn't want to be left out.


She's interested in working through the unit study on her own during summer break.  I think this is a great idea!  All of Homeschool Legacy's Once-a-Week unit studies are an engaging yet not "but I don't want to do schoolwork!" activity for traditional brick-and-mortar students on a summer break.  If you have a Boy Scout or an American Heritage Girl, each of these follow the merit badge requirements for the programs.  They'd be perfect for a 1-2 week day camp program, or just worked on piecemeal at a weekly meeting - about a month, they'd have earned an Art Merit Badge.

We absolutely loved Knights and Nobles from Homeschool Legacy.  It's a program that can be worked on just once a week, allowing you to keep your "regular" curriculum yet inject something "different" into your week.  It allows for all grade levels to participate, even the kindergarteners outside the Grades 2-12 age range, and at the appropriate course depth for their needs.  We'll continue through this program (Life on a Manor is up next), and probably consider their other programs for next year.

Click the banner below to read reviews of other Once-a-Week unit studies from Homeschool Legacy, or follow them on social media:

Facebook: https://www.facebook.com/homeschoollegacy
Pinterest: http://pinterest.com/hslegacy
Twitter: http://twitter.com/homeschoollegac


Homeschool Legacy Review


©2012- 2015 Adventures with Jude. All rights reserved. All text, photographs, artwork, and other content may not be reproduced or transmitted in any form without the written consent of the author. http://adventureswithjude.com

Wednesday, May 13, 2015

Pumpkin Waffle Wednesday


vegan pumpkin waffles and cream cheese frosting recipes

We've had a theme going this week.  We had Meatloaf Monday (Neal makes an awesome meatloaf, but don't ask me for the recipe - it's one of those "little of this, bit of that, Meg stay out of the way" things), followed by Taco Tuesday.  We tossed around Wednesday dinner ideas, and "Waffle Wednesday" won.  (Say THAT last bit ten times fast!)

Matthew requested pumpkin waffles, so I decided to up the ante and make cream cheese frosting to serve with them, instead of maple syrup.  You could just top them with maple syrup, but hey...any reason for cream cheese frosting.  These recipes are gluten free and vegan, but you'd never know it.  All you can taste is YUM!

Pumpkin Waffles 

Makes 4-5 large Belgian-style waffles

2 cups  sugar
1  cup  canola oil
1 large (29-oz) can pumpkin puree
2 cups water
1 box gluten free Bisquick baking mix (approx 3 cups)
3 tbsp  pumpkin pie spice


Preheat your waffle iron according to manufacturer's directions.


Mix the sugar, oil, pumpkin and water in a large bowl.

Add the baking mix and spices.  Stir to thoroughly combine.  Mixture will be thick.

Spoon into waffle iron.  (Ours takes about 2 cups per waffle.)

Bake in iron for 10-12 minutes.  

Serve with maple syrup, or cream cheese topping.


Vegan Cream Cheese Topping


1 tub Daiya cream cheese (plain flavor)
2 cups confectioner's sugar
1 Tbsp lemon juice
1 tsp vanilla 
1/2 tsp cinnamon extract (optional)

In a mixing bowl, combine all ingredients until smooth.  Spoon over hot waffles and allow to melt and ooze deliciousness everywhere.


(Somebody dove in before I could take pictures!  He wasn't waiting for mom!)


©2012- 2015 Adventures with Jude. All rights reserved. All text, photographs, artwork, and other content may not be reproduced or transmitted in any form without the written consent of the author. http://adventureswithjude.com

The Wright Brothers: On the Wings of a Dream


American brothers, inventors, and aviation pioneers Orville and Wilbur Wright are credited with inventing and building the world's first successful airplane, as well as making the first controlled, powered and sustained heavier-than-air human flight. While they were the first to successfully fly, they are not the first to try to get this idea off the ground. While the dream of flying is as old as mankind itself, the concept of the airplane has only been around for two centuries. Rather than building flying vehicles, people thought to imitate birds, strapping wings onto their arms. It seemed like it should be a good plan; after all, there are plenty of birds in the air to show that the concept does work. The trouble is, not only does works better at bird-scale than it does at the much larger human sizes, but mass of the flier is an issue. Even larger birds have a hidden secret that makes them lightweight enough to fly; unlike humans, birds have hollow bones. People tried to build machines with flapping wings called ornithopters, but again, mass was an issue, so other ways to fly were sought. The first hot air balloon floated into the sky in 1783, and while this type of travel was amusing, navigation was at the mercy of wind direction. Then in 1804, Sir George Cayley created the first glider that flew with a man on board, but gliders were difficult to control and weren’t able to travel long distances. By studying the successes and flaws of each of these concepts, the Wright brothers made the dream of human-operated flight a reality.

Early life and experiments


Orville and Wilbur were two of seven children born to Protestant Bishop Milton Wright and Susan Catherine Koerner. Wilbur was born near Millville, Indiana, in 1867; Orville in Dayton, Ohio, in 1871. Their mother, who spent her youth assisting in her father’s carriage shop and became the family’s toolsmith, became their mentor because she was able to answer just about any engineering-related question the brothers could conceive. While Orville dropped out of high school after his junior year to start a printing business in 1889, Wilbur planned to attend college to further his study of engineering. However, Wilbur’s plans to enter college ended when he was injured in a hockey accident in the winter of 1885. It took him three years to recover his health, during which time he read extensively in his father’s library, assisted his father with legal and church problems, and cared for his invalid mother, who died of tuberculosis in 1889.

Otto Lilienthal
Otto Lilienthal
US Public Domain
In 1892, the brothers opened a bicycle sales and repair shop, and by 1896. they began to build bicycles themselves. By 1899, they were successful enough to be able to stop reinvesting in the shop. They took their experience from designing and building lightweight bicycles and the shop’s profits and began experimenting in aeronautics. In interviews, the Wrights dated their fascination with flight to a small helicopter toy their father had gifted them as youths. Accounts of German glider pioneer Otto Lilienthal also piqued their interest, but it was news reports of Lilienthal’s death in a glider crash- in August 1896 that marked the beginning of their serious interest in flight. By 1899, the brothers had exhausted the resources of the local library, and wrote to the Smithsonian Institution for suggestions for further study. They wrote to Octave Chanute, a leading civil engineer and an authority on aviation, asking for his aid; he became a great confidant of the brothers during the early years of study.

A Dream Takes Flight 


The ability of the Wright brothers to analyze a mechanical problem and move toward a solution was invaluable to their work in aeronautics. The brothers identified three components to a successful flight: wings of sufficient size and shape to generate lift, a propulsion system to move the craft through the air, and a system to control the it during flight. In studying prior aeronautic engineers’ designs, they found two of them fairly well developed. Lilienthal had built wings capable of carrying him in flight, while the builders of self-propelled vehicles were developing lighter and more powerful internal-combustion engines. The final problem to be solved, they concluded, was controlling the aircraft.

Their first experiments with “wing warping,” as the system would be called, were made with a small biplane kite flown in Dayton in the summer of 1899. Discovering that they could cause the kite to climb, dive, and bank to the right or left at will, the brothers began to design their first full-scale glider using Lilienthal’s data to calculate the amount of wing surface area required to lift the estimated weight of the machine and pilot in a wind of given velocity. However the brothers soon realized that Dayton, with its relatively low winds and flat terrain, was not the ideal place to conduct aeronautical experiments. The Wrights sent a request to the U.S. Weather Bureau, asking for a list of more suitable areas. From the list in the reply, the brothers selected Kitty Hawk, an isolated village on the Outer Banks of North Carolina. It provided the perfect requirements for aviation experiments. On the island were few inhabitants (less risk of civilian casualty), high average winds, tall dunes from which to glide, and soft sand for landings.

1900 Wright flyer Replica
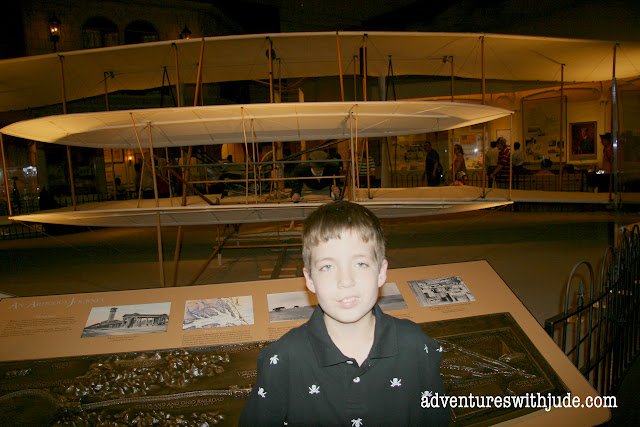
Replica of 1900 Wright flyer
On Display at the Smithsonian Air and Space Museum
In October, 1900, the Wrights began testing their first biplane glider. It featured 165 square feet (15 square meters) of wing area, a forward elevator for pitch control, and Wilbur Wright in the cockpit. The glider developed less lift than expected, however, and very few free flights were made with a pilot on board. The brothers ultimately flew the glider as a kite. However, these test flights gathered information that would be critically important in the design of future aircraft.

Eager to improve on the disappointing performance of their 1900 glider, the Wrights increased the wing area of their next machine to 290 square feet (26 square meters). Establishing their camp at the foot of the Kill Devil Hills, 4 miles (6.5 km) south of Kitty Hawk, the brothers completed 50 to 100 glides in July and August of 1901. As in 1900, Wilbur made all the glides, the best of which covered nearly 400 feet (120 meters). The 1901 Wright aircraft was an improvement over its predecessor, but it still did not perform as well as their calculations had predicted. Moreover, the experience of 1901 suggested that the problems of control were not fully resolved. In the end, they determined that the failure of their gliders to match calculated performance was the result of errors in the experimental data published by their predecessors. To create new, more accurate calculations, the Wrights constructed a small wind tunnel with which to gather their own information.

Even if one refused to acknowledge the brothers’ critical thinking skills, their brilliance was unmistakably obvious in the design of their wind-tunnel balances. These instruments mounted inside the tunnel and actually measured the forces operating on the model wings. During the fall and early winter of 1901, the Wrights tested between 100 and 200 wing designs in their wind tunnel, gathering information on the relative efficiencies and effects of different wing shapes, wing tip designs, and gap sizes between the two wings of a biplane. With the results of the wind-tunnel tests in hand, the brothers began work on their third full-scale glider.

1902 Glider test flight
US Public Domain
They tested the machine at the Kill Devil Hills camp in September and October of 1902. It performed exactly as the design calculations predicted. For the first time, the brothers shared the flying duties, completing over 700 flights. The airplane was finally covering significant distances (up to 622.5 feet), and it remained in the air for as long as 26 seconds! In addition to gaining significant experience in the air, the Wrights were able to complete their control system by adding a movable rudder linked to the wing-warping system. With the major aerodynamic and control problems behind them, the brothers were ready to build a motor-powered flying machine.

The Wrights enlisted Charles Taylor, a machinist from the bicycle shop, to help them design and built a four-cylinder internal-combustion engine. Recognizing that propeller blades could be understood as secondary and rotary wings, the group used their wind tunnel data to develop twin pusher propellers. Returning to Kill Devil Hills in late 1903, with the blueprints for the 1902 glider and a motor, they spent the next seven weeks assembling, testing, and repairing their powered machine. Wilbur made the first attempt at powered flight on December 14,1903, but he stalled the aircraft on take-off and damaged the forward section of the machine. Three days were spent making repairs and waiting for the return of good weather. Finally, the morning of December 17, 1903, the brother and five local citizen witnesses were ready. Orville made the first successful flight, covering 120 feet through the air in 12 seconds. Returning to the cockpit, Wilbur flew 175 feet in 12 seconds on his first flight. Each took a second flight that day; Orville’s second effort stayed airborne for 15 seconds and covered 200 feet, but it was Wilbur’s next flight that was most successful. Wilbur’s 59 second flight sailed flew 852 feet over the island. For the first time in history, a heavier-than-air machine had demonstrated powered and sustained flight under the complete control of the pilot.

Orville's Telegraph Home
Telegraph from Orville to his father announcing four successful flights.
US Public Domain

1905 Wright Flyer III
US Public Domain
Despite the excitement of those flights, the brothers wanted to build a practical airplane. Returning to Huffman Prairie near Dayton, Ohio, the Wrights spent 1904 and 1905 building and testing two new aircraft. After nearly each flight, they tinkered with the planes, gaining skill and confidence in the air with each flight. By October 1905 the brothers could remain aloft for up to 39 minutes at a time, performing circles and other maneuvers. No longer able to hide the extent of their success from the press, and concerned that the essential features of their machine would be understood and copied by knowledgeable observers, the Wrights decided to cease flying and remain on the ground until their invention was protected by patents and they had negotiated a contract for its sale.

Making the Invention Public


With this now near-complete blackout, few believed in the Wright brothers’ success. During 1906 and 1907, a handful of European and American pioneers, armed with incomplete understandings of the Wrights’ research, struggled into the air. Meanwhile the brothers, confident that they retained a commanding lead over their rivals, continued to quietly negotiate with financiers and government purchasing agents on two continents.

In February 1908, the Wrights triumphantly signed a contract with the U.S. Army. They would receive $25,000 for delivering a machine capable of flying for at least one hour with a pilot and passenger at an average speed of 40 miles per hour. The following month, they signed a second agreement with a group of French investors interested in building and selling Wright machines under license. Returning to Kill Devil Hills in May 1908, they made 22 flights with their old 1905 machine, and modified it with upright seating and hand controls. On May 14, 1908, Wilbur took off with mechanic Charles Furnas as his first passenger. He then sailed to France. There he made his first public flight, flying over the Hunaudières Race Course near Le Mans, France on August 8, 1908. During the months that followed, the elite of the continent traveled to France and Italy to watch Wilbur fly.

Wright Military Flyer
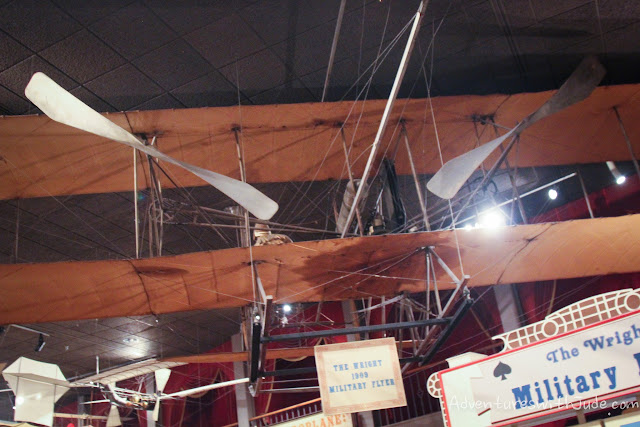
The Wright Military Flyer
On Display at The Smithsonian Air and Space Museum

Back in Fort Myer, Virginia, Orville began the U.S. Army trials with a flight on September 3, 1908. Two weeks later, later a split propeller caused a crash that badly injured the piloting Orville and killed passenger Lieutenant Thomas E. Selfridge. While recovering, Orville and his sister Katharine visited Wilbur in Europe. Together, the brothers returned to Fort Myer to complete the Army trials in 1909. Because this craft could exceed the the required speed of 40 miles per hour, the Wrights earned a bonus of $5,000. Following the successful Fort Myer trials, Orville traveled to Germany, where he flew at Berlin and Potsdam, while Wilbur made several important flights as part of New York City’s Hudson-Fulton Celebration. Wilbur then went to College Park, Maryland, where he trained the first three U.S. Army pilots.

Going Into Business


In November 1909, the Wright Company was incorporated. Wilbur served as president, Orville as one of two vice presidents, and the a board of trustees included some of the leaders of American business. The Wright Company established a factory in Dayton and an airfield at Huffman Prairie to train pilots. Among the Army pilots trained at the facility was Henry H. (“Hap”) Arnold, who would rise to command of the U.S. Army Air Forces during World War II. The brothers also formed the Wright Exhibition Company in March 1910, with A. Roy Knabenshue, an experienced balloon and airship pilot, as manager. Although the Wrights were not particularly interested in this sort of venture, they recognized that an exhibition team would generate a steady supplemental revenues. Orville began training pilots for the exhibition team at Montgomery, Alabama, and continued instruction at Huffman Prairie. The exhibition company made its first appearance at Indianapolis in June, 1910. However, the death of several team members in the first year of business underscored the risk in this venture, and the brothers decided to dissolve the second company in November, 1911.

Despite their brilliance, the brothers’ success was tempered by intellectual property theft. While Orville took over training pilots in 1909, Wilbur turned his energy to the legal end of the business. He brought a series of lawsuits against rival aircraft builders whom the brothers believed had infringed upon their patent rights in the United States and Europe. In Germany, the Wright claims were denied. The position of the Wright brothers was upheld in virtually every court judgment in France and America, but the defendants manipulated the legal process to avoid being forced into substantial payments. (Many of them likely had attorneys who studied case law that included how farmers skirted patent rights held by American engineer Eli Whitney.) In addition to the financial burden these suits caused, the Wrights’ spirited defense of their patents complicated their public image. Once inaccurately regarded as a pair of naive mechanical geniuses, they were now unfairly blamed for having retarded the advance of flight technology by bringing suit against other talented experimenters. Eventually, lawsuits regarding the Wrights’ patents ended; by 1917, the Wright patents expired in France and the U.S. government created a patent pool in the interest of national defense.

Orville carries on the legacy


Exhausted by business and legal concerns and suffering from typhoid fever, Wilbur died on May 30, 1912. Although Wilbur had drawn Orville into aeronautics, he had taken the lead in business matters since 1905. Upon his brother’s death, Orville assumed leadership of the Wright Company, and won the 1913 Collier Trophy for his work on an automatic stabilizer for aircraft. He remained active in the company until 1915, when he sold his interest to a group of financiers. One of the first legacies of the Wrights’ work was realized during World War I, when Orville worked as a consulting engineer. The Dayton-Wright Company planned production of foreign aircraft designs, and assisted in the development of a pilotless aircraft bomb, changing how it and all future wars would be fought. On January 27, 1948, Orville suffered a heart attack and died three days later in a Dayton hospital.

Raised in small-town Ohio, Wilbur and Orville Wright never attended college but had an innate intellectual curiosity and aptitude for science that knew few bounds. Through careful observation and experimentation, they discovered and corrected past aviators’ flaws. Together, the Wright brothers developed the first successful airplane in Kitty Hawk, North Carolina, developed innovative aeronautic technology, and changed how wars would be fought. There is perhaps no more fitting epitaph for either of the Wright brothers than the words crafted by a group of their friends to identify the 1903 Wright airplane on display at the Smithsonian:


Brothers Wilbur and Orville Wright are arguably spokesmen for the idea of the blue collar American. Considered the fathers of modern aviation, these national heroes took the concept of dream of human flight and made it soar.


Cover Image Source:
Orville Wright
Wilbur Wright


 ©2012- 2015 Adventures with Jude. All rights reserved. All text, photographs, artwork, and other content may not be reproduced or transmitted in any form without the written consent of the author. http://adventureswithjude.com
Related Posts Plugin for WordPress, Blogger...
Pin It button on image hover