Showing posts with label low-mess art projects. Show all posts

Tuesday, November 7, 2017

Thin Stix Creativity Pack (Homeschool Review Crew)


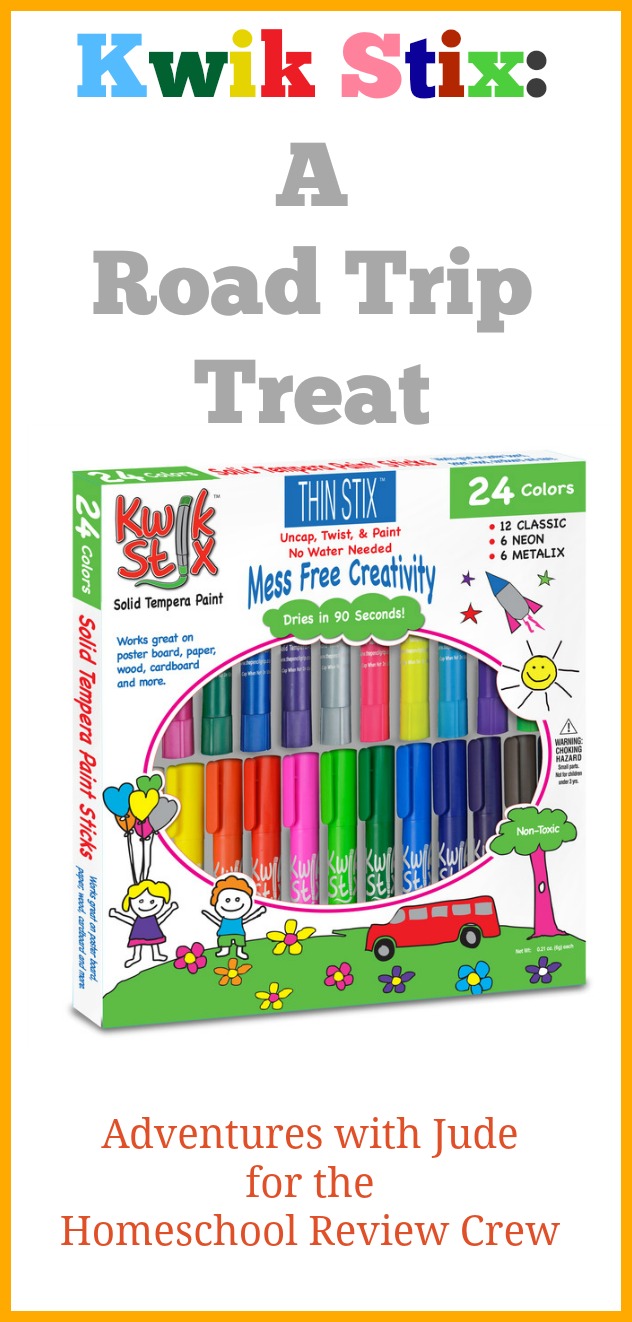
When we go on our touring trips, our days are chock full of activity.  We are up early, out the door to wherever we are going, and often come back to the hotel positively exhausted around dinner time.  When we return, there is usually a little bit of time between baths and bedtime where the boys want to do something besides watch shows on TV (assuming we can figure out the unfamiliar channel guide) or videos on their iPads.  This trip, I brought our Kwik Stix Thin Stix Creativity Pack from The Pencil Grip, Inc. in our suitcase.


I loved how easy they were to bring along.  Travelers could certainly transfer them to a zip-top bag so they'd fit into a corner of the suitcase or between items, but we left them in their original packaging because it is very slim and packed flat on top of our packing bags.  (Note: It also packed well at the bottom of the suitcase on our way home.)  When we reviewed Kwik Stix in the past, I was impressed at how quickly they dried and how little mess they made. This was a definite plus for taking them to a hotel.  Yes, crayons and markers are items that are relatively mess-free, but the kids and I liked the novelty of the thin, marker-dimension paint sticks rather than "boring old crayons."

This trip, we're traveling with Aunt Jo and Uncle Brendan from Australia. They came all the way from Canberra to surprise the kids! I knew they were coming, so I had to secretly make plans for us to go away, but it's always fun traveling with Uncle Brendan because he's a big kid at heart.  Damien grabbed the Kwik Stix, a bunch of paper (also easy to pack flat in a pocket of the suitcase), and ran through the connecting doors to show them what we brought.  To his delight, Uncle Brendan sat down, and they started drawing together.


It was just before Halloween, and the guys were trying to "out scare" each other with their drawings. Damien met his match, I think!  The blur is the kangaroo "boxing" with the Ghostbuster.


After a few rounds of "Who can draw the bloodiest creature?" they decided to have a real drawing contest, and Aunt Jo got to be the judge.  I'm sure the folks in the lobby heard Damien's squeals when he was declared the winner.  Poor Uncle Brendan -- even his 3-D creation didn't sway the judge.


This Kwik Stix pack is especially nice because it has a LOT of paint sticks in it. It contains a total of 24 paint markers: 12 classic colors (basics like red, blue, green, etc.), 6 neon, and 6 metallics.  The neon orange and silver metallic tones gussied up Uncle Brendan's portrait of the emu!


The Pencil Grip, Inc. does offer other packages of Kwik Stix -- just the classics (in multiple sizes), neons alone, etc., but I think between the "specialness" of the "big" pack, as well as its packability, it is definitely something that makes for a special car or hotel "vacation activity" treat.

For more ideas on how to use Kwik Stix Thin Stix, click the banner below to read more reviews.

Thin Stix Creativity Pack {The Pencil Grip, Inc. Reviews}


Want to keep up with all of our adventures?
Subscribe below to get Adventures with Jude delivered to your inbox.

Enter your email address:


Delivered by FeedBurner


©2012- 2017 Adventures with Jude. All rights reserved. All text, photographs, artwork, and other content may not be reproduced or transmitted in any form without the written consent of the author. http://adventureswithjude.com

Wednesday, May 24, 2017

The Pencil Grip, Inc: Thin Stix (Homeschool Review Crew)

When Jude and Damien were at preschool levels, we did daily arts and crafts projects.  While we don't do projects like we used to, we usually keep a good supply of project supplies in the house because they enjoy doing craft projects on their own.  When I restock our shelves, I always try to go with quality over quantity where appropriate, because life is too short for cheap crayons!  Paint is always a favorite medium, and we love our Thin Stix  6pk of Classic Colors  from The Pencil Grip, Inc.  Design and quality makes them must-haves for us!


These new paint sticks are a skinny, pencil-like version of the glue-stick shaped Kwik Stix that we were introduced to last summer.  Both styles are tempera paint sticks - think a solid block of poster paint in a twist-up, no-brush-needed form. We loved the original Kwik Stix, but their chunky glue-stick dimensions meant they were ideal for smaller hands, but a little lacking for older kids who wanted to draw finer details. Thin Stix are the answer.

These longer, slender sticks have a mechanical concept like a twist-up crayon. They definitely edge out crayons, though, for several reasons.  Instead of being a wax-based medium that needs a thick coating of product for intense color but the tempura paint in the Thin Stix gives bright colors with minimal product.  Another point in the "Thin Stix Column" is they are quick-dry (under 90 seconds), and once the paint dries, it is bonded to the paper.  It won't flake off onto clothes or surfaces, or smear into other areas of the picture like lacquered-on wax from a crayon. However, despite it sticking well to paper, it easily cleans up from the table with a little bit of water and a paper towel.


Damien especially liked using them with the puppet theatre that he built.  Because they work like conventional writing implements, it made it easy to precisely color in areas of the shell.  There's no paintbrush to try to control.


Crayons have a tendency to snap in the boys' hands (low muscle tone means they need to hold them with a more-than-normal pressure), so they often gravitate towards markers for coloring.  However, Thin Stix edged out markers here. Because the paint is a solid bullet, rather than siphoned ink like a marker, coloring a vertical surface is easy!


The plastic casing around the paint is sturdy, as well as the paint bullet itself.  The twist-up mechanism means that only a small portion of product needs to be exposed at any time, cutting down on the potential for breaking and smearing.  The bullet itself holds up to the heavy pressure of "coloring dark" and doesn't snap.

The paint is also intensely pigmented.  Because it dries fully in about a minute and a half, it is easy to layer several coats of it to get extra-bright colors, or to get a bright and genuine primary shade when coloring on a piece of colored paper. It's easy to get bright colors on white paper, but that means you have to color everything when you start with a white base. For his puppet theater, Damien wanted to create scenery flats. This one is a picnic scene, and he used a piece of blue cardstock because the bulk of the view should be a blue sky and horizon.  However, what's a picnic unless the sun is shining?  After only two layers of paint, his sun is bright yellow despite the intense blue behind it.


We enjoyed our original Kwik Stix, but love the Thin Stix.  They're definitely going to be a permanent part of our supply box.

100 Crew families have been creating masterpieces with Thin Stix.  Check out their pictures by clicking the banner below.

No Mess Art with Thin Stix Classic Colors {The Pencil Grip, Inc. Reviews}


©2012- 2016 Adventures with Jude. All rights reserved. All text, photographs, artwork, and other content may not be reproduced or transmitted in any form without the written consent of the author. http://adventureswithjude.com

Tuesday, May 3, 2016

The Pencil Grip, Inc: Kwik Stix (A Schoolhouse Crew Review)

Solid Tempera Paint Sticks; Paint with bright colors, no brush, no mess

We've done close to two hundred of reviews over the last few years.  Some have been well-loved while others have had a countdown clock until we could put them away.  However, before now I've never had a review product disappear from my hands before the delivery truck had even left the driveway!  As I picked up the box from the doorstep and waved to the "Package Man," I saw it was from The Pencil Grip, Inc. and knew it contained our Kwik Stix 12 pk.  I had the carton mostly open when the little boys elbowed their way in to see what was in the box. Before I could finish saying, "They're painting crayons!" they had run off to the basement with them.  By the time I tossed the outer box in the recycling bin and caught up to them, Jude and Damien already had put them in action!


Kwik Stix are solid tempera paint sticks -- think "poster paint meets glue stick."  They are chunky enough for small hands but easily manipulated to create thinner lines with the edges of the stick.  (After 15 years of slogging to occupational and speech therapy appointments, my first thought was, "Wow, I wonder if they have these at duPont!")  As you use what's at the end, just "turn up" the bottom to expose more paint.


Suggested media for painting with these includes poster- or cardboard, wood, and canvas.  The paint applied with the same feel as watercolor crayons, so I offered to let the boys use the "good" art paper (Canson Cold Press 140 lb for watercolors) for their drawings.  (Usually, we just use basic copy paper for "just feel like drawing" artwork.)


The colors are brilliant and intense, just like traditional tempera/poster paints, and Kwik Stix dry in an astoundingly fast 90 seconds!  If you're impatient but like to layer colors, this helps speed things along. Fast drying also means that the chance for smearing across sleeve cuffs and shirt fronts is significantly reduced. (These have a distinct advantage over the watercolor crayons here!)

The 12 pack comes with primary, secondary, and neutral colors, so there's plenty of variety.  There are also six-stick packages of primary/neutrals, neon colors, and metallic colors; for classroom or big family use, there is a 96 pack that includes eight each of twelve colors. Normally when I buy paint, I stick to primary colors, because we can usually make secondary and tertiary colors with them.  However, because these are sticks, you can only blend the layered paint, not pre-mix them to create a uniform second color.  You also need to work very quickly, because they dry so quickly.  I found that sometimes it helped to go over the blending with the white stick, to help "re-wet" and smudge the paint, but generally, you can't mix colors - only gently smooth sharp edges.


I can't say how excited I am that these are not messy like regular paint. Even purposely smudging the paint, my fingers stayed relatively clean.  The little bit of paint that did transfer onto my hand washed off easily with generic hand soap and water. No technicolor fingers!


Generally speaking, except for Celia's acrylic paints for Art Club and a few random Sharpies,  I don't buy art supplies that are not labeled "Washable."  Damien has even tried to pick out a new box of crayons at the store, and turned around and put them back -- without being told -- because he realized the box didn't say they were washable.  These paints technically aren't "washable," but I was willing to give them a chance because they dry so quickly.  I figured with pushed up or short sleeves and quick drying time, they might not be so bad.

As I passed by the craft supplies in the basement, I spied a piece of muslin and had an idea.  Now, I would hope that the boys wouldn't be purposely wiping paint on their shirts.  However, with these boys, you never really know!  So, in the name of laundry science, I smeared and I scrubbed.


Not bad.  With dish detergent (Dawn, to be precise) and some scrubbing, most of the color came out. Some of the more intense colors had remnants, though. I'm comfortable letting the boys use these with indirect supervision (me in the room, but not hovering), and if they happen to get a little on them accidentally, immediately washing the garment.  I can't guarantee it will come out, but I don't think they're like Celia's paints where once the paint is on the shirt, it's done for.


We are thrilled with Kwik Stix from The Pencil Grip, Inc.  Even after several uses by artists with heavy hands, there is still plenty of paint left in the tube.  While they are not the same as a traditional pot-and-brush painting style, they're a less-messy way to work on fine motor skills. I'm not surprised that these are a great occupational therapy tool -- after all, The Pencil Grip, Inc. is known for their ergonomic pencil grips that have been a OT staple for nearly 25 years! These paint sticks are going to become a permanent addition to our art supply box!

To find out more about Kwik Stix, follow the Pencil Grip, Inc. on social media, or click the banner below to read more Crew reviews!

Facebook: https://facebook.com/thepencilgrip
Pinterest: https://pinterest.com/KwikStixPaint/
Twitter: https://twitter.com/ThePencilGrip


Kwik Stix The Pencil Grip, Inc. Review


©2012- 2016 Adventures with Jude. All rights reserved. All text, photographs, artwork, and other content may not be reproduced or transmitted in any form without the written consent of the author. http://adventureswithjude.com

Friday, May 2, 2014

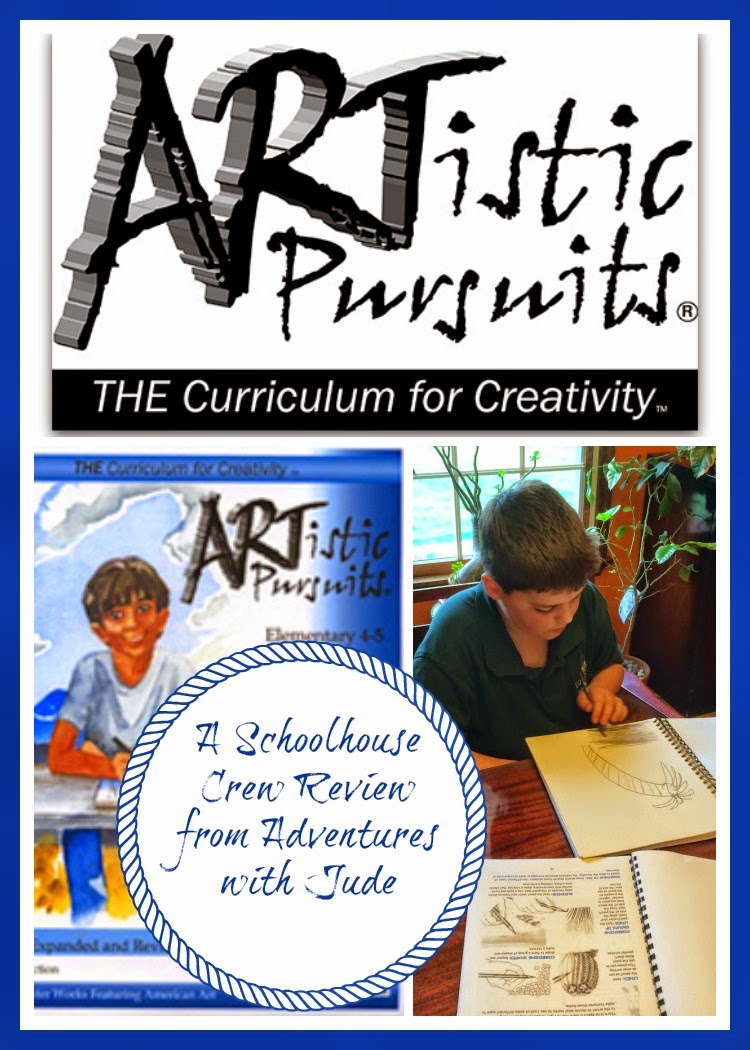
Artistic Pursuits (A Schoolhouse Crew Review)


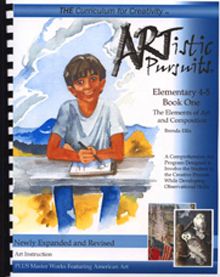
ARTistic Pursuits is a homeschool art curriculum for students of all ages.  With a total of 13 books, ranging from preschool to high school levels, there is a program for every student.  Matthew has been reviewing the Elementary 4-5, Book 1: The Elements of Art and Composition ($47.95, plus art supplies). Although this book is actually intended for younger elementary students, seventh-grader Matthew is a beginning art student, so this suited his skill level well.


ARTistic Pursuits Review
The Elements of Art and Composition literally begins at the start of freehand drawing.  Working in black and white, activities are mainly about line, shape and form.  The focus is on honing observational skills, and learning to focus on practicing drawing "what you see" and letting go of the need to draw "what you think others expect you to see."  The lessons start with absolute basics -- the direction to not be afraid of the white space of the paper!

Each unit focuses on a different aspect of drawing, and how to work on controlling your final product so that it fits in itself.  For example, an early lesson discusses space - both the space your drawing takes up, and the space that it does not.  When it comes to art, the adage "A picture is worth a thousand words" is never more appropriate.  The program uses paintings to help explain the lesson, and how adjusting that concept completely changes your final drawing.  Some are images that we have seen often before, including Emmanuel Leutze's Washington Crossing the Delaware and Portrait of the Artist's Mother by James Whistler.  There are also a number of student renderings included in each lesson.  While it's very helpful to have professional, well-known works included (they are classic art because of the artists' skill and beautifully illustrate the ideas being taught), having simpler, more rudiementary student examples helps the student gain confidence, and not feel they have to be Louvre-caliber artists right out of the gate.


In addition to using the famous art as concept examples, each unit includes a study of the artist, and a contextual historical study.   While this would not suffice to create an entire social studies/history course, it would certainly be a good parallel study, or can be used to round out the art program with basic art history.

This past year, Matthew has gotten involved with the Art Club at school.  He will be homeschooled next year, and I know that art was something that he was going to miss. I also think he may have a real talent for it - he has a very good eye, and has brought home several simple yet impressive for a true beginner paintings.  He also is a doodler -- I find all kinds of drawings on the back of papers, in margins, etc.  I really wanted to try this program for him because I would like him to be able to continue with art.  Ideally, we will find a local artist to tutor him, but in the meantime, I wanted him to have a way to learn skills on his own.   Because he's really a beginning student, going down to a "lower grade" really didn't pose an issue.  He's used to working in acrylics, and he struggled a little with the idea of black and white pencils being "all" he had to work with.  However, I think it is good to begin with pencil and then move on to color, because the student is forced to learn control - control of his grip, pressure on the pencil, etc.  This actually translated to his acrylic work, where he had a better eye for light/shade. He also said he had an easier time painting because he didn't have as much smearing -- he wasn't globbing paint on as much.


This program is ideal for both homeschoolers and in-schoolers.  The lessons (four per unit) are meant to be done at a rate of two per week, making it not overly burdensome to add to the school day.  How long each lesson takes really depends on what the student decides to draw.  Sometimes, Matthew only spent about half an hour on a sketch, while other days he may have spent a couple of hours if it was more detailed.  (At two lessons/week, it will take a full school year to complete the course.)  They are also simple enough that a student could complete a unit a week with near-daily practice.

This is definitely a program I see us continuing through the summer and into next year.  I think we would likely mix in some other media/art styles just to break things up, perhaps doing blocks of 4-6 weeks with this program and then a week of using a color media to keep his interest.  (There is a book on Color and Composition as well that I think would interest him.)   Everything is sequentially laid out and well explained, making this an ideal program for the student who wants to learn artistic principles.


Click to read Crew Reviews


 ©2012- 2014 Adventures with Jude. All rights reserved. All text, photographs, artwork, and other content may not be reproduced or transmitted in any form without the written consent of the author. http://adventureswithjude.com

Thursday, February 23, 2012

Origami Butterflies

origami butterflies tutorial

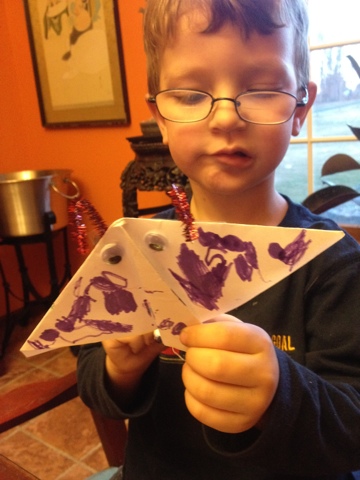
The boys spend a lot of time waiting for each other to finish therapy appointments. Often, we take our work with us to the hospital. It gives him something to do while waiting, and if Jude gets all his work done before Damien is finished, it means his afternoon is his own.  The part of his lessons Jude looks forward to the most are arts and crafts, so I try to plan something for each day. Some days it's a big cut-and-paste project, sometimes I just pour some paints and let him loose with some paper. I'm always on the hunt for simple (and not messy) projects that we can do "on the road."  When I saw this origami butterfly project over at Family Fun Magazine, I knew it would be perfect for this.  (The original plan was to draw eyes and skip the antennae, but we ran out of time at the hospital and brought it home.  This meant we got to use some of our favorite craft items: googley eyes!)

Besides crafts, Jude loves shapes, so this was a great project for him. He liked seeing how the paper folded into different shapes, and eventually into something totally different.  He kept asking was "Are we making paper airplanes?"  He didn't realize you could fold paper into anything BUT a paper airplane. (Big brother Luke has a thing for airplanes to where you could write the next installment of "If you give..." as "If you give Luke a piece of paper, he'll make a paper airplane." He was excited to know how to make something his brother couldn't.)
 
(For more detailed instructions, refer to the link above.)


Take a 5" x 5" square of paper, and turn it so it looks like a diamond.


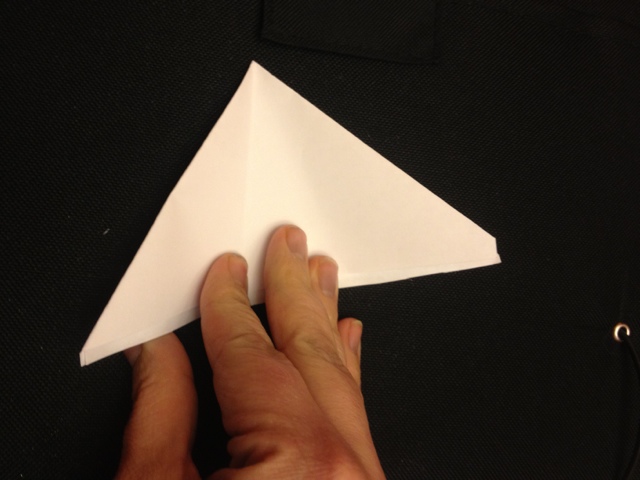
Fold the top point to the bottom and crease, creating a triangle.



Fold the left point of the triangle to meet the right, and crease. Turn the triangle so the wide side is towards you, and the point is furthest away.


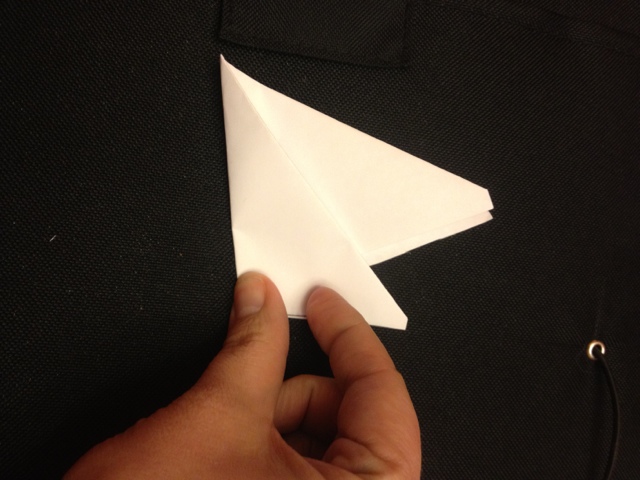
Fold the left point towards the right, so that the side of the original triangle is in the middle of its right half.  The left point will extend below the bottom of the triangle. Crease.


Lift up the top right point, and open into a triangle, and flatten.  The fold from the last step will be hidden under the triangle.


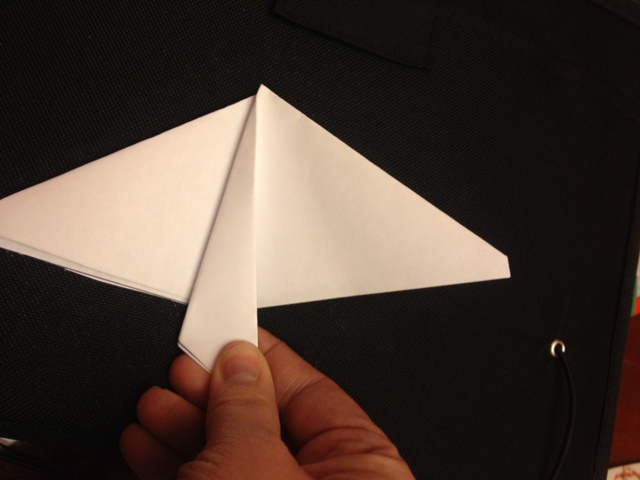
Turn the triangle over, to expose the center piece.  Lay it towards the right side, and press down to crease the two triangles at the back, creating the wings.


Fold the center triangle over, so that it makes a narrow triangle. This is the butterfly's body. Crease the left side (the fold) sharply. If your paper is a little thick (copy paper or heavier), you may want to use a dab of glue to help hold it flat. 

 (If you are using a lighter weight paper, like true origami paper or filler paper, it may hold itself down. 
After we were done, Luke made one himself from a piece of looseleaf and it held flat by itself.)


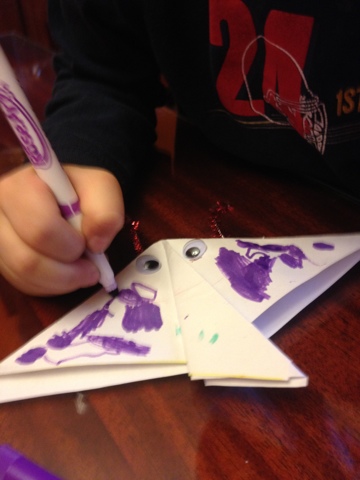
Now add the details.  As I said, our original plan was to draw eyes on; since we were home, we glued some googley eyes onto our butterfly.  Jude decided to use a pink colored pencil for his smiley mouth, so it's a little hard to see,  but this is a happy butterfly!


decorating our origami butterfly
Decorate your butterfly with lots of colors. Or just one -- whatever you like.


If you have chenille stems, cut one so you have 2 - 3" pieces. Glue or tape them to the back, one on either side of the point, leaving about 2" extending from the top.  Fold or curl the tops.  (If you don't have chenille stems, that's ok. Instead of a flying butterfly, you've made a *swimming stingray*.)


origami butterfly craft

Ready to take flight!!!


Crafty Kids Link Up Teach Beside Me Photobucket
Related Posts Plugin for WordPress, Blogger...
Pin It button on image hover