Arts and crafts are a great way to help students learn! Crafts can be found for nearly any subject, and the details adjusted based on grade level. Here's my first example!
Learning about cultures is a great way to use arts and crafts. It can be adapted based on topic and the student's level. For example:
Let's study Hispanic holidays. For a young child, a calabaza coloring page and a story that celebrate the holiday Dia de los Muertos might be a sufficient introduction. The coloring page reinforces the lesson on the holiday, but also provides an opportunity for fine motor skill practice, creativity, identifiying and combining colors, etc. In fact, many of Jude's holiday lessons are a book-and-craft combo (check out our Holiday Books collection - it's a work in progress because I put a lot of books away before I remembered to pin them!)
 However, this might be too simple for an older student. This is one of Luke's assignments. His task was to build a clock, based on a theme in Hispanic culture. He chose Las Fiestas del Año. Each hour represents a month of the year, and each vignette is an illustration of a Hispanic holiday or festival held during that month in a Hispanic country. To go through an entire year, many different countries are represented, showing how widespread the culture is. On the back of the clock, he affixed a list of the months, the name of the holiday, the country where it is celebrated, and a short description. The project involved research, writing, and artistic expression/interpretation, and really, was a lot more fun than writing a paper. Assembling the clock also helped him learn in a tactile way - placing specific holidays in each area, crafting the parts, etc. - which helped reinforce what he was learning.
 Almost every subject can be "craftified" (as Matthew puts it).
Science
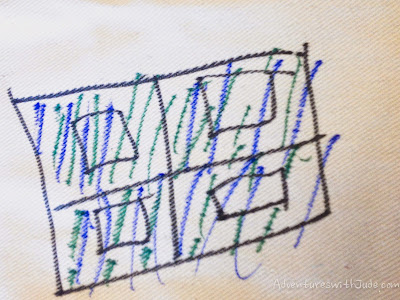
Here's an example of chromatography. Matthew made this apron, but you can do a bandanna, a T-shirt, or a tote bag.Materials:
cotton-based fabric
Sharpie or other permanent marker
Rubbing Alcohol
Medicine syringe or eyedropper
White paper towels (ones with patterns may cause a dye transfer, if you want to use a cloth towel make sure it is color-fast)
Cover your surface to protect it. (We used a trash bag since my vinyl tablecover is currently packed away while we refinish the schoolroom floors.) Place layer of paper towel underneath to absorb the alcohol. (If you're using a shirt or tote, place a piece of plastic and towel between the layers so it doesn't dye the back as well!)
Draw on the fabric with the Sharpies.
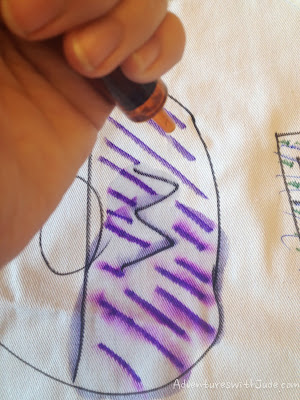
Dribble rubbing alcohol onto the fabric. The wetter the fabric, the more the color will run, because there is more solvent to separate the dyes in the marker.
Allow to dry. How long it takes will depend on how saturated it is, however rubbing alcohol dries faster than water so it shouldn't take too long. It took about an hour for our apron to dry totally.
Why you want to protect your table:
Here's a idea for using up leftover bits of paper and felt: Mosaics.
Mosaics, or using small bits of colored stone shaped into a picture, have been made since ancient Greek and Roman periods on walls and floors. Many have been lost over the years, but a good number survive, especially in churches and cathedrals. You don't get much more "artistic" than the word "mosaic" - derived from the Greek mouseios meaning belonging to the Muses. Modern mosaics can be anything from a huge portrait to a garden stepping stone.
Mosaics are a great way to use up bits and pieces of leftover felt and construction paper! When we do a project, I stuff the scraps into a zip-top bag, and tuck them away. Sometimes, especially if it's a larger leftover, we can use it for another project, but the little "inbetween other cuttings" scraps are great for mosaics. You can do a "theme" to tie it into any lesson, or just do a "create something for fun" mosaic, by cutting the scraps into smaller pieces and gluing them into a design. It can be anything from an elaborate scene to just a freeform shape.
Click on the button below to read what my fellow Crew members are blogging about. With topics ranging from Reading to Road Trips and Curriculum inbetween, there's something for everyone!
©2012- 2013 Adventures with Jude. All rights reserved. All text, photographs, artwork, and other content may not be reproduced or transmitted in any form without the written consent of the author. http://adventureswithjude.com


"Craftified" <---- I love this word and plan to borrow it often! We craftify a lot of our schoolwork as well. 8-)
ReplyDeleteI really like Luke's "clock"! What a great idea that I will definitely be borrowing!
ReplyDeleteWhat great ideas! Love them! We are crafty here, too, so I know my kids will enjoy this. :-)
ReplyDeleteThis is a great resource. I'm so happy I came here from Wake Up Wednesday.
ReplyDelete