John Pinette is one of my favorite comedians. I have to admit, I have a similar skepticism of juicing. "Juice is not a verb."
I'll give Marcy all the credit for juicer research. I went back to her blog to look at what she was using. She likes her juicer for hard fruits and veggies, but said it was not so ideal for softer produce. Since I wanted mine specifically for juicing strawberries, I opted for a model that has a "soft fruit" speed. The "package man" delivered it this week, and I set it up right away. Strawberries are FINALLY in season, so we are really gorging on them while we can! I pulled out a quart of strawberries and started juicing.
I can sum up this machine in one word. AWESOME. It made short work of the berries, and extracted almost 13 ounces of ruby-hued juice from a scant quart of berries. And there was not a single seed floating in it! I wouldn't say the pulp was bone dry, but when I tried to run it through the hopper again, nothing more was extracted. I switched out the pitcher for a bowl, and ran a couple of Granny Smith apples through it to make strawberry-apple juice for Damien. The pulp left from the apples was very dry - the consistency of damp sand. So yes, if there is juice to come out, this juicer wrings every drop!
Celia drank a glass of strawberry juice with her dinner, and we used the leftover to make strawberry juice marshmallows. I've tried to make strawberry marshmallows before, first using berry puree (how we learned it burns). Then I tried making strawberry extract by macerating strawberries in rum. Despite a very strong flavor when I tasted the extract itself, that candy barely had a strawberry aroma. Celia and Damien love plain marshmallows (we go through two or three pans a week), but the I-can-outsmart-EoE side of me was on a mission to make strawberry marshmallows. I was hoping that the strawberry juice would do it. So Celia and I made marshmallows with the remaining juice.
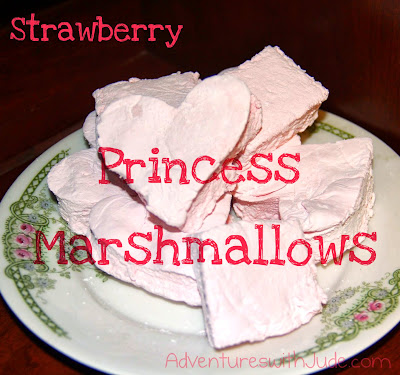
Verdict -- these are Strawberry marshmallows. Yes, with a capital S and italics. When I open the container, you can smell strawberries. When you bite the delicately pink marshmallow, you get a burst of berry on your tongue. Celia says they are perfect for a Princess Party. Or Valentine's Day. Or Lunch. I like them plain, and Celia likes them roasted. Damien doesn't care one way or the other -- just keep them coming!
Strawberry Princess Marshmallows
Ingredients:
1 cup strawberry juice, divided (about 1 pint strawberries, juiced)
3 packets unflavored gelatin
2 1/2 cups granulated sugar
powdered sugar (for dusting)
Note: You can use any powdered sugar. We purchase Tate & Lyle Icing Sugar from an online import shop. It's only sold in the UK, and it is pure cane sugar with no added starches. You can use any brand of "10x" or powdered sugar.
Special Equipment:
no-stick foil (not totally necessary, but added insurance when removing marshmallows from pan)
candy thermometer
electric mixer
silicone or rubber spatula
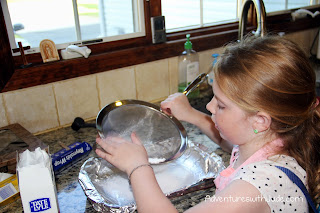
This is a good project to do with kids, but a grown-up should do the thermometer and pouring parts.
Line a 9x13 pan with (no-stick) aluminum foil. Sift powdered sugar generously, coating the bottom fully and the sides as best as you can.
In a heat-proof mixing bowl, place 1/2 c. juice and gelatin. Mix to combine and allow gelatin to soften for about 10 minutes.
If you're using a stand mixer, use the whisk attachment.
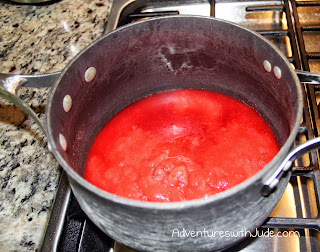
In a small saucepan, mix remaining 1/2 c. juice with the granulated sugar. Over medium heat, melt the sugar into the juice, stirring gently. Bring to a full boil, place a lid on the pot, and set a timer for 3 minutes. DO NOT STIR THE SUGAR MIXTURE AFTER THIS POINT. You don't want to create any crystals that will make your marshmallows gritty.
After 3 minutes, remove the lid.
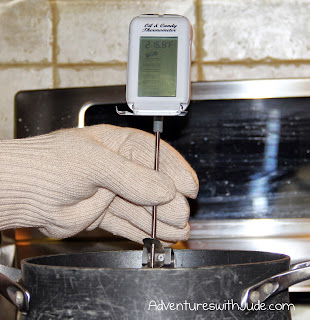
Carefully insert a candy thermometer into the syrup, and continue cooking until it reaches the soft ball stage (235* F). Carefully remove the pan from the heat.

Start the mixer at low speed, and begin beating the gelatin mixture to break it up. Carefully pour the sugar syrup in, trying to avoid the side and the beater(s). DO NOT SCRAPE THE PAN - this can introduce crystals to the marshmallows. Just pour what comes out of the pan freely.
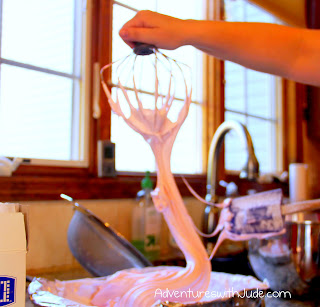
Slowly turn the mixer speed up to full speed. Beat until fluffy, the volume of marshmallow nearly fills the bowl, and the bowl is mostly cool to the touch. (A little warmth is OK, but you should be able to comfortably hold your hand against it.)
Pour the marshmallow into the sugared pan. Gently scrape the sides with a spatula. You don't want to scrape the bowl clean (you may introduce crystals), just get what comes off easily. There will be a thin film of marshmallow that clings to the bowl.
Coat the top of the panned marshmallow with powdered sugar. Gently press the marshmallow out so that it fills the pan and the top is mostly smooth. Allow to cool for 1-2 hours.
Find volunteers to lick the spatula and beaters. There's never a shortage of those here.
Lift the foil out of the pan, and turn the marshmallow over onto a cutting board. Gently remove the foil.
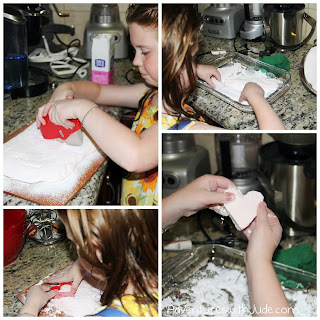
Sift a bit of powdered sugar into the marshmallow pan. Cut the marshmallows with a pizza cutter, sharp knife, or cookie cutter. (If using a cookie cutter, dust in sugar first.)
Roll the cut edges in the powdered sugar to keep them from sticking. Store in an airtight container. Enjoy!
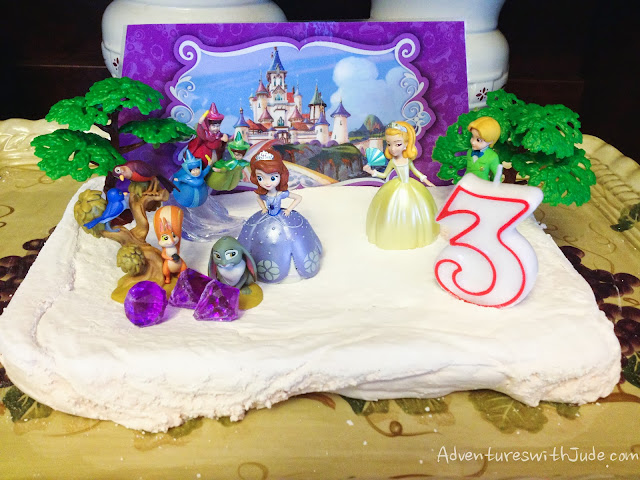
Here's an alternative for a fun, allergy-friendly birthday! Leave it uncut, and set cake toppers and a candle in it. This is Damien's birthday cake!
Linking up with:

©2012- 2013 Adventures with Jude. All rights reserved. All text, photographs, artwork, and other content may not be reproduced or transmitted in any form without the written consent of the author. http://adventureswithjude.com





oh that's awesome! We go through a lot of marshmallows here too! I like your recipe - it seems much simpler! Could you post your regular marshmallow recipe without the juice too?
ReplyDeleteI use the same recipe, but use water instead of juice, and add 1 Tbsp of light rum in the last minute of beating (it works like vanilla - it's not "rummy" but it just cuts the sugar a little). Celia can have rum because it's a sugar product. Sometime I'd like to try making them with brown sugar to see if they come out caramel-y, but I always chicken out because I'm afraid the syrup will burn.
DeleteOh how wonderful! I've pinned and shared - thanks for linking up with Kids in the Kitchen!
ReplyDeleteThis looks wonderful! I am featuring this recipe this week! Congratulations! :-) Be sure to stop by and grab an "I've been featured button" from my sidebar for your blog. The post should go live around 11pm Eastern on Monday. Hope you will be able to join us again this week. Many blessings, Lisa :-)
ReplyDeleteLooks awesome!! What kind of gelatin did you use?
ReplyDeletePlain old Knox -- last I checked, it is pork based so safe for us.
DeleteThis looks like fun! We have a juicer, so juicing the strawberries will be easy-peasy. And I have several marshmallow fanatics who will gobble these right up.
ReplyDeleteThanks for linking up over at Food on Friday!
TaMara @ Tales of a Pee Dee Mama
This looks wonderful. We have an old juicer my dad bought for me when I was 16. Let's just say that was over 20 years ago. We use it A LOT. It has made a difference in the health department. I'm going to try and make some marshmallows thanks to your post.
ReplyDelete