Onion rings were a treat that we would enjoy in our before-allergies lives. I used to be able to tell you who had really good ones (a particular burger joint that is named for a colorful bird) and ones that weren't worth the calories (a royal fast food chain). However, restaurants that make gluten free, dairy free, non-cross-contaminated onion rings are pretty rare. That means if we want them, it's a DIY project.
Deep frying them is messy, and a lot higher in calories than baking them. However, I think that if you're going to go through the work, it's worth doing them right. Make sure you use a large "sweet" onion (like a Vidalia or Maui type) and take the inner membrane/skin off. It helps the coating stick to the onion, so you don't have onion sliding in your mouth and the coating still in your hand. You can cut a few calories by using club soda instead of lemon-lime soda, but I found that the finished rings are crisp but pale - more like a light blond color - than a deep "golden brown and delicious" hue. The shortcut is using gluten free Bisquick for the "flour". I've tried mixing my own flours, but I never seem to get the ratios right. I've come to the conclusion that if you need self-raising flour, this mix is just magic.
You'd be surprised how many rings you get out of one onion. I made a double batch, and we all ate ourselves silly and had some leftover! To reheat them, bake at 350°F for about 5-8 minutes until warm and crispy.
Gluten Free Onion Rings
1 large sweet onion
1 box gluten free Bisquick (approx 4 cups)
3 cans lemon-lime soda
oil for deep frying (we used canola)
kosher salt
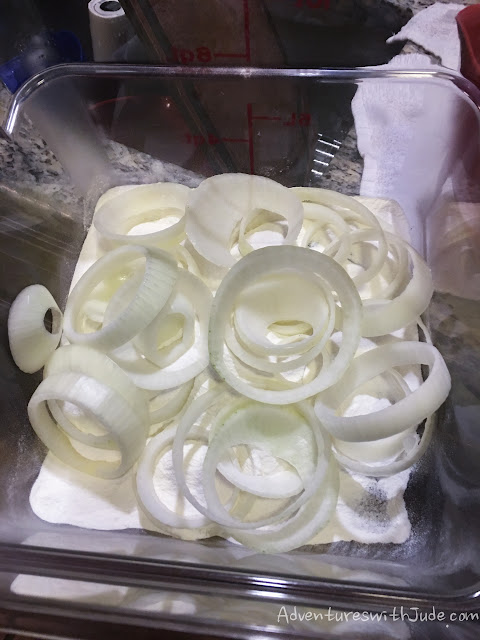
Cut the ends off the onion. Carefully peel the outer skin off. Slice the onion crosswise (parallel to the root end) into 1/2 inch rounds.
Separate the rounds into individual onion rings. Keep the big ones, and save the very small core pieces for something that needs chopped or sauteed onions - they're too difficult to "skin."
Use your fingernail to break/scrape up the inner membrane, and carefully pull it away from the onion. Discard this skin, and put your ring to the side.
Yes, this is tedious. But it makes the difference between the batter clinging and sliding off.
Place the Bisquick in a large container. Gently toss the onion rings in the DRY mixture. The flour will bond with any moisture from the onion, creating a "glue" to help the batter stick.
Remove the coated rings, shaking to get off any loose powder, and place to the side. Add the first two cans of lemon-lime soda to the Bisquick, whisking quickly. It will begin as a thick dough and slowly thin to a batter consistency. If it's still more dough than batter, add the third can, a little at a time, while whisking gently to combine. (You don't want to pop any leavening bubbles!) Continue slowly adding soda until you have a batter that is similar to a thick pancake batter (you may not need the entire can). It should support the weight of the onions but not be so thick as to be gloppy.
Heat a deep pot filled halfway with canola oil to between 325-350°F. (Below and they won't fry quickly enough and will become oil-logged, too high and the outside will burn before the onion cooks.)
Dredge the onions in the batter, and slip them into the oil in small batches. Cook for 2-3 minutes, or until golden brown.
Remove the onions from the oil with tongs or a slotted spoon, and place on paper towels to drain. Sprinkle a pinch of salt over them, and allow to cool slightly. BE PATIENT... or you will burn your fingers and mouth!
Repeat until all of the onions are cooked. Make sure your oil returns to the correct temperature between batches.
Serve alongside hamburgers...or any other favorite meal.

©2012- 2016 Adventures with Jude. All rights reserved. All text, photographs, artwork, and other content may not be reproduced or transmitted in any form without the written consent of the author. http://adventureswithjude.com


No comments:
Post a Comment