

The boys spend a lot of time waiting for each other to finish therapy appointments. Often, we take our work with us to the hospital. It gives him something to do while waiting, and if Jude gets all his work done before Damien is finished, it means his afternoon is his own. The part of his lessons Jude looks forward to the most are arts and crafts, so I try to plan something for each day. Some days it's a big cut-and-paste project, sometimes I just pour some paints and let him loose with some paper. I'm always on the hunt for simple (and not messy) projects that we can do "on the road." When I saw this origami butterfly project over at Family Fun Magazine, I knew it would be perfect for this. (The original plan was to draw eyes and skip the antennae, but we ran out of time at the hospital and brought it home. This meant we got to use some of our favorite craft items: googley eyes!)
Besides crafts, Jude loves shapes, so this was a great project for him. He liked seeing how the paper folded into different shapes, and eventually into something totally different. He kept asking was "Are we making paper airplanes?" He didn't realize you could fold paper into anything BUT a paper airplane. (Big brother Luke has a thing for airplanes to where you could write the next installment of "If you give..." as "If you give Luke a piece of paper, he'll make a paper airplane." He was excited to know how to make something his brother couldn't.)
(For more detailed instructions, refer to the link above.)
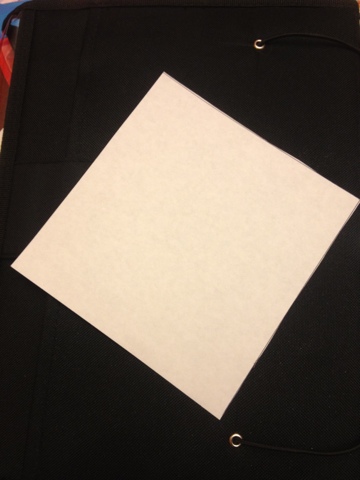
Take a 5" x 5" square of paper, and turn it so it looks like a diamond.

Fold the top point to the bottom and crease, creating a triangle.

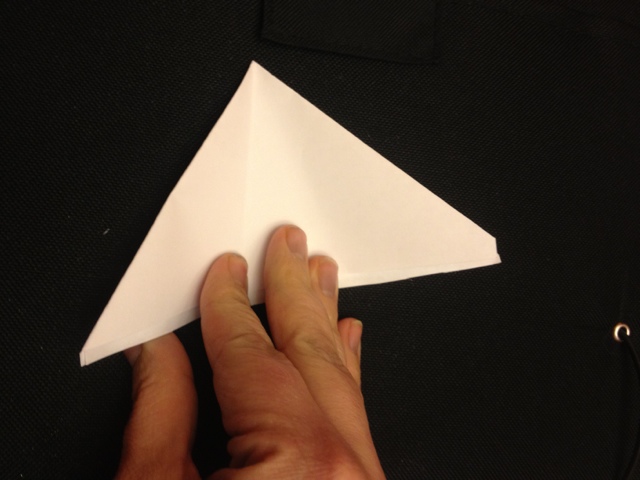
Fold the left point of the triangle to meet the right, and crease. Turn the triangle so the wide side is towards you, and the point is furthest away.
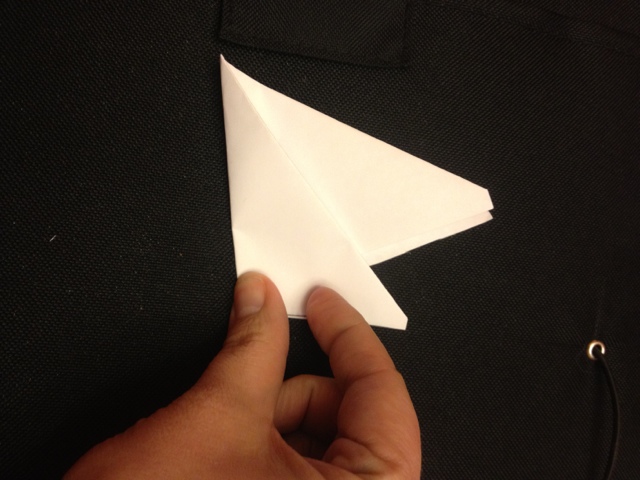
Fold the left point towards the right, so that the side of the original triangle is in the middle of its right half. The left point will extend below the bottom of the triangle. Crease.
Lift up the top right point, and open into a triangle, and flatten. The fold from the last step will be hidden under the triangle.

Turn the triangle over, to expose the center piece. Lay it towards the right side, and press down to crease the two triangles at the back, creating the wings.
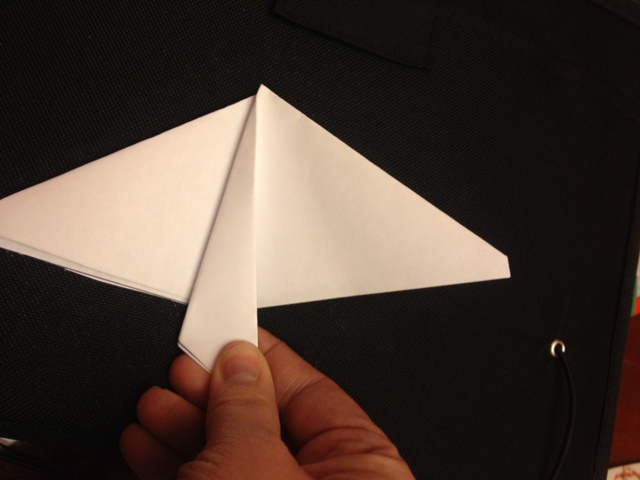
Fold the center triangle over, so that it makes a narrow triangle. This is the butterfly's body. Crease the left side (the fold) sharply. If your paper is a little thick (copy paper or heavier), you may want to use a dab of glue to help hold it flat.
(If you are using a lighter weight paper, like true origami paper or filler paper, it may hold itself down.
After we were done, Luke made one himself from a piece of looseleaf and it held flat by itself.)
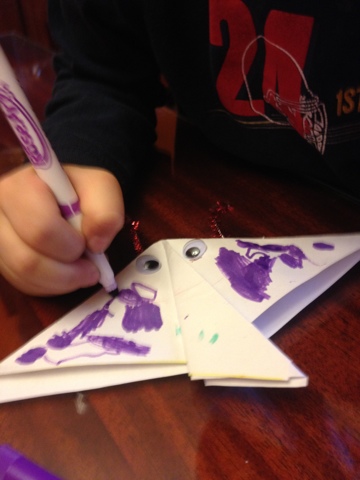
Now add the details. As I said, our original plan was to draw eyes on; since we were home, we glued some googley eyes onto our butterfly. Jude decided to use a pink colored pencil for his smiley mouth, so it's a little hard to see, but this is a happy butterfly!

Decorate your butterfly with lots of colors. Or just one -- whatever you like.
If you have chenille stems, cut one so you have 2 - 3" pieces. Glue or tape them to the back, one on either side of the point, leaving about 2" extending from the top. Fold or curl the tops. (If you don't have chenille stems, that's ok. Instead of a flying butterfly, you've made a *swimming stingray*.)
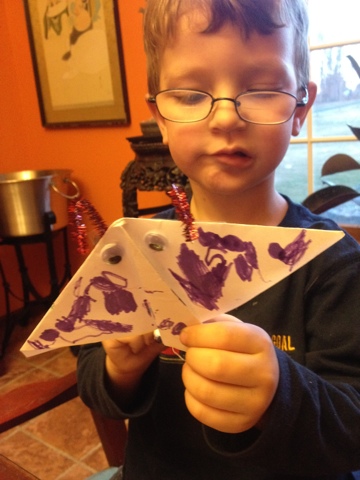
Ready to take flight!!!


My boys love doing origami, too. Their favorite shape is a frog right now.
ReplyDeleteOh, how fun!! I love origami. Thank you for sharing at Sharing Saturday!
ReplyDelete