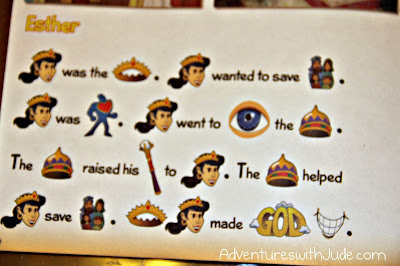
The front page of our workbook sheet asked the student to recall who was courageous in the story. Esther was brave for going to King Xerxes and telling him of Haman's plan to get rid of all the Jews, even though she knew the king might not listen. But King Xerxes was brave, too, because he listened and recognized that Esther was telling the truth. Haman was not courageous. He was bad.
Then Jude was asked to choose situations where he could show courage. Right away, he knew that not following the crowd was being brave. Doing his work or reading the Bible takes courage. But he was adamant that he wasn't interested in being brave enough to try new foods.
Our program always includes an accompanying Bible verse. This lesson's verse was from St. Paul's first letter to the Corinthians:
The timing was perfect because Purim, a Jewish holiday that celebrates the defeat of Haman, is celebrated this week. We have read two books about Purim. One is The Story of Esther, which is a beautifully illustrated telling of her story. Jude's favorite, though, was The Better-than-Best Purim. His favorite character was the "pirate parrot." In this one, the Little Old Lady asked for help making Hamentashen, and her animals were too busy. She thought they only wanted to help eat, but they were busy planning a Purim party, complete with mishloach manot baskets.
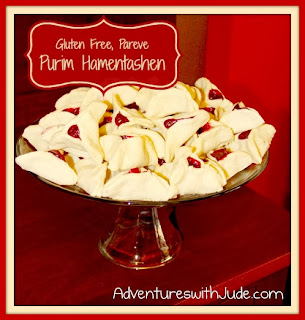
After reading the story, we started our Hamentashen. It's Jude's great-grandmother's recipe. She used the same dough for her Hamentashen as she did for her Rugelach, so we did too. We made ours safe for everyone's allergies - so no wheat/gluten, nuts, dairy, or soy.
 Hamentashen Dough:
5 1/2 c. King Arthur Gluten Free flour mix
2 Tbsp xanthan gum
2 1/2 heaping Tbsp baking powder
3/4 c. sugar
1 tsp vanilla (optional)
2 eggs
6 oz/170 g. shortening, melted
1 c. coconut milk
Fillings
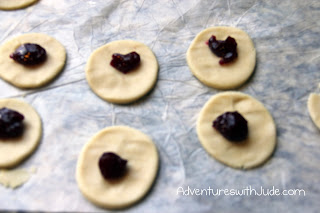
Traditional ones are poppyseed filling, plum jam, or apricot jam. We used chocolate spread (some with mini marshmallows to make s'more hamentashen) and cherry baker's filling.

Vanilla is part of Mom Mom's recipe. We forgot to put it in. Oops! But they still were yummy, so it was all good. We also needed about 1/4 cup of extra water as well, because our dough was very dry. If you're able to measure very carefully, you probably won't need it. If you have a helper who is a little heavy handed with measuring flour, feel free to adjust accordingly. The dough should hold itself together when gently pressed together - it should be neither crumbly nor sticky.
Preheat oven to 400* F.

Combine dry ingredients.
(Jude quickly learned to be careful turning on the mixer -- if you turn it on too fast, it makes a mess!)

In a separate bowl, lightly beat the eggs.
Add the shortening and milk, followed by the eggs.
Turn the dough out onto a parchment-lined counter. (If you don't have parchment, liberally flour the countertop. But I highly recommend parchment to help with no sticking.)
Roll the dough to about 1/8" (0.3cm) thick.
Using a drinking glass, cut circles out of the dough.
My understanding is Mom Mom made hers pretty large. This was the largest glass we had. A biscuit cutter would work too. Don't go any smaller than 2" (5 cm) though, because otherwise you don't have enough room for filling.
Add a small amount of filling to the center of each round.
Less than a teaspoon - we borrowed some of Damien's baby spoons.
A regular spoon is fine, just keep the dollops small enough to be sealed within the dough.

Fold the dough over to create the traditional triangle shape.
Pleat the dough at "12 o'clock" to form the top peak.
Fold the bottom of the round up over the bottom, and pinch the edges to seal. Make sure you pinch them VERY tightly - otherwise they will puff open in the oven and you'll lose your shape.

I think Jude could use a little more practice, but pretty good for a first try.
Bake for 10-12 minutes, or until slightly golden. Cool on a wire rack.
We got about five dozen 2" cookies from this batch of dough.
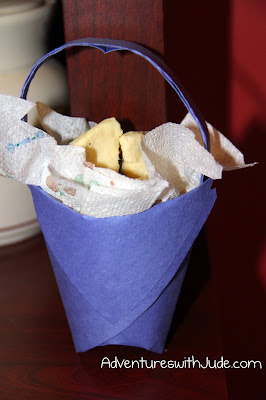
Mom Mom now lives in a nursing home near Luke's school. When Neal went to pick him up today, he took her a mishloach minot basket filled with our hamentashen. You can find instructions on how to make this at the Bible Belt Balabusta's website. It takes literally less than two minutes.
Happy Purim! May you be as courageous as Queen Esther!
Celebrating Purim with friends:


Thank you for making a dairy free version! We are doing the story of Esther this week and I didn't know if I'd be able to make these! I'll have a happy girl!
ReplyDeleteCasey
How wonderful that you make the learning of Bible stories so hands-on! I love all of the photos! :-) They look really good, too! Thanks for linking up with "Try a New Recipe Tuesday!" I hope you will be able to join us again this week.
ReplyDeleteIs the first image in this post from a book of Bible stories told in pictograms? If so, I'd love to know where you got it from for use in our Children's Ministry! Thanks.
ReplyDeleteYes, it is. It's part of a kindergarten curriculum from DiscipleLand called Discover Bible Heroes! I've attached a link to the program's landing page.
ReplyDeletehttp://www.discipleland.com/Kindergarten/
What a neat, hands on activity! The results look delicious too!
ReplyDelete